Updating My Name + Personal Information Step by Step Guide
What's in This Guide
- As a CCA student, you may set your preferred name directly in Workday with no documentation required.
- Preferred name is whatever name you generally like to go by, and it does not have to match your legal name.
- Preferred name defaults to your legal name until changed.
- Once set, preferred name will be visible in more places in Workday, including in directory searches.
- You may also update your legal name on file by uploading accepted legal documentation in Workday.
- Make updates to your personal information, like gender identity and preferred pronouns. Some changes, like date of birth, citizenship, race/ethnicity, and gender, require documentation and processing for approval.
General Notes:
- For changes to legal name and personal information, international students, domestic students, and employees all have distinct documentation requirements (outlined on the Workday forms).
- Please see the Transgender Student Resources Portal pages for additional information and resources.
Before You Begin...
Check out our Intro to Workday for a quick overview of some of Workday’s primary features. Next, learn how to navigate your student profile to complete a wide range of tasks.
- Edit Your Preferred Name -
1. Log in to Workday
a. Go to workday.cca.edu, and log in using your CCA Account credentials.
2. View Your Student Profile
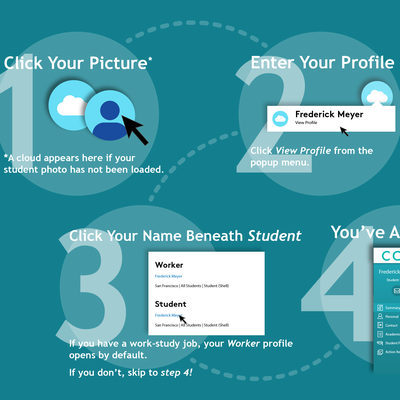
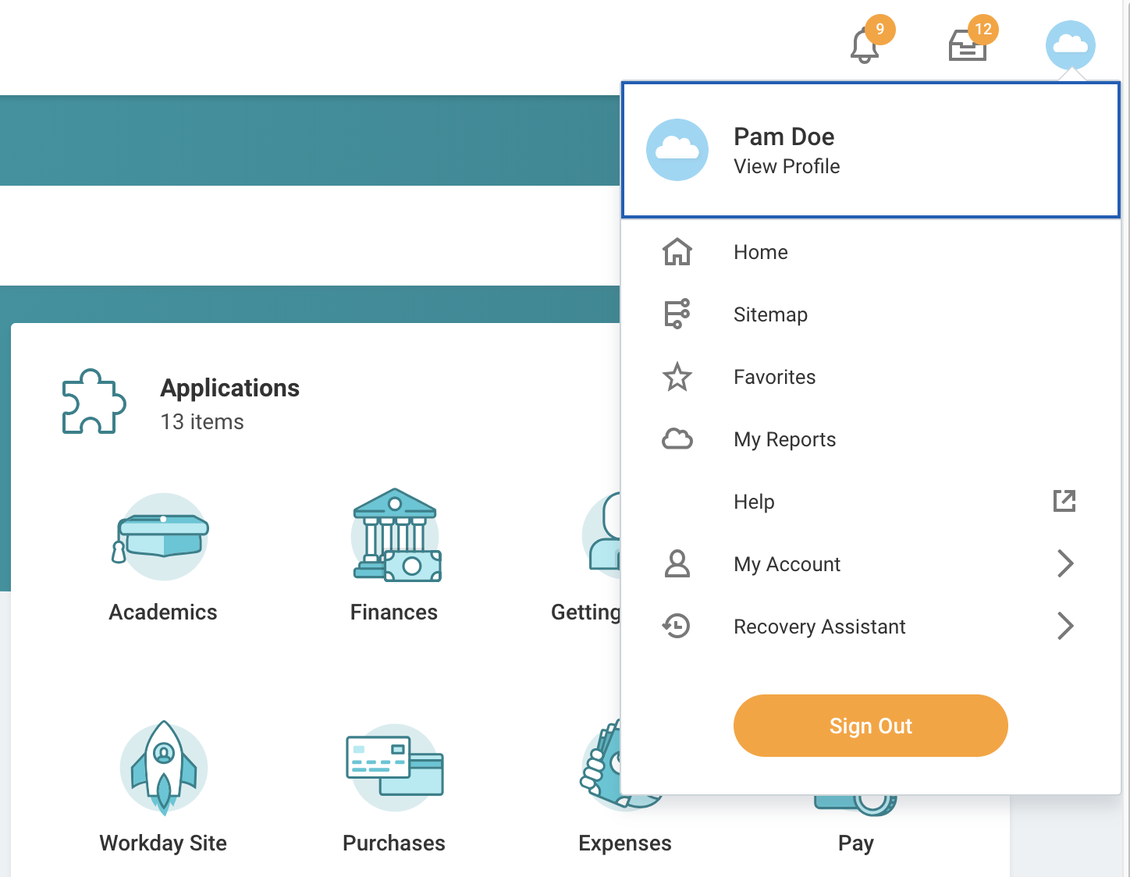
a. Click the cloud icon in the upper right corner of your screen to pull up your profile submenu.
- When CCA uploads your photo, it will show up here instead of the cloud.
b. Click View Profile.
c. Navigate to your student profile.
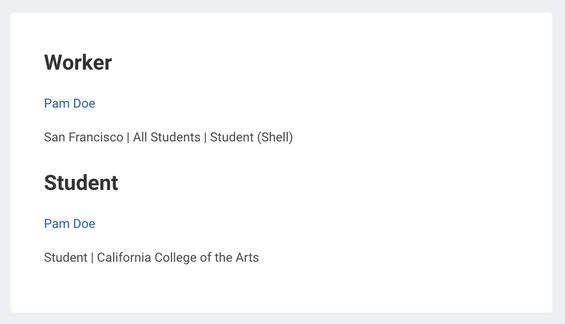
- A tile appears on your profile Summary page with two headings: Worker and Student.
- Click your name beneath the Student heading.
- For more information on student and worker profiles, see step 3 of Navigating My Student Profile Step by Step Guide.
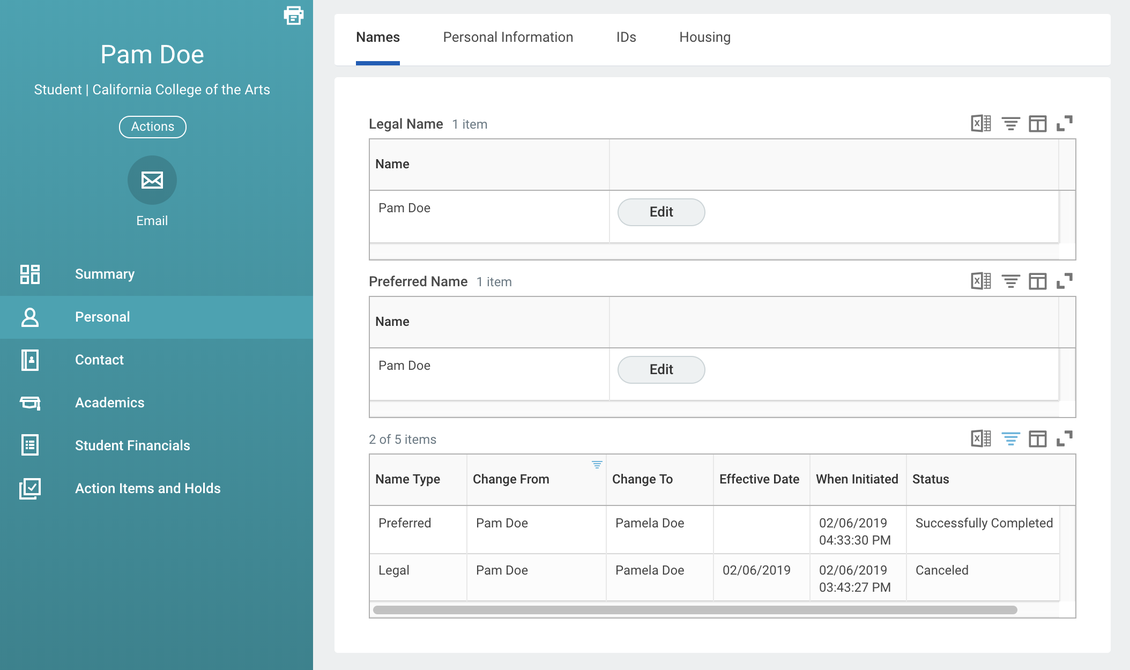
3. Access the Names Screen
a. Click the Personal tab on your profile’s teal sidebar.
- This tab is available in both student and worker profiles, but it displays slightly different content in each.
- Legal name edits automatically update across profiles.
b. Within the Personal sidebar tab, a menu of subtabs appears across the screen. Click the Names subtab.
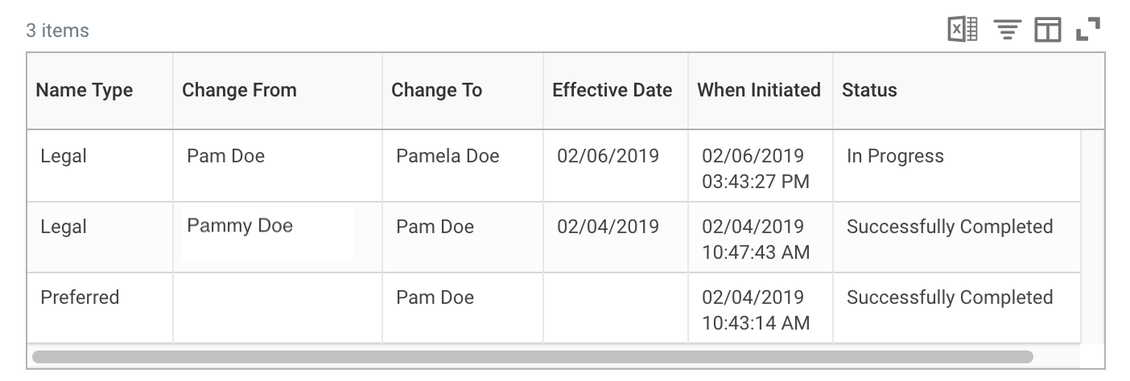
c. Three tables will appear on your screen:
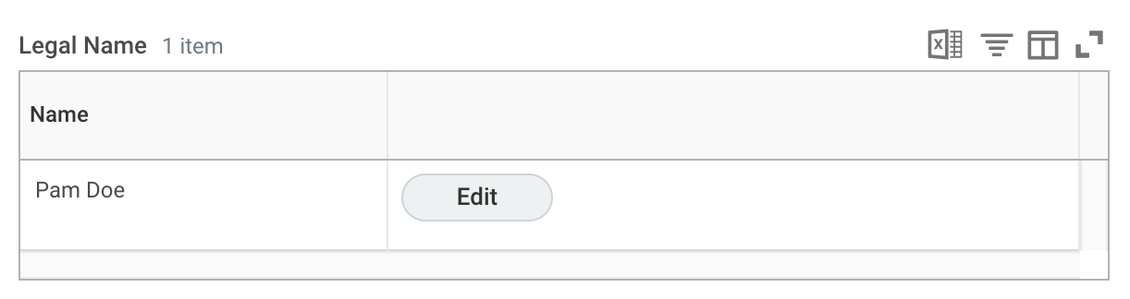
- The Legal Name table shows which name CCA has on file for all official or legal documentation.
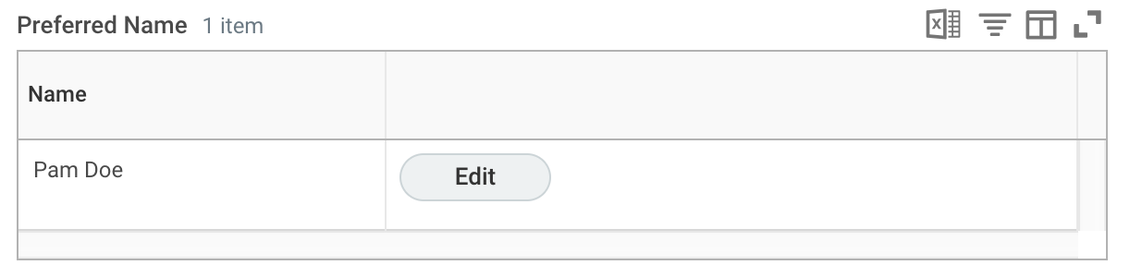
- The Preferred Name table automatically defaults to your legal name but can be edited as desired.
- The bottommost table displays changes made to your legal or preferred name, including what changes were made and when.
4. Fill Out the Edit Preferred Name Form
a. Within the Preferred Name table, click the Edit button.
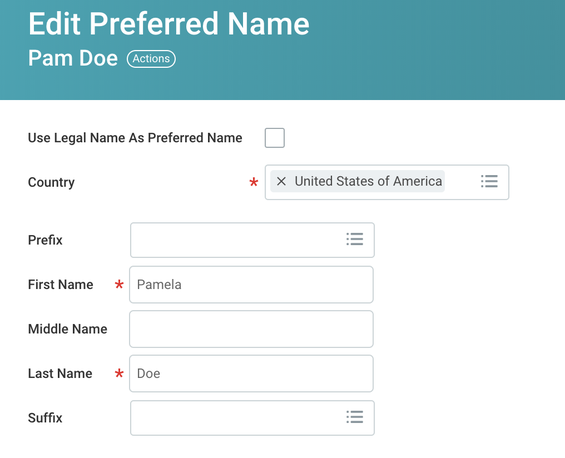
b. Uncheck the Use Legal Name As Preferred Name box if checked.
- Unchecking this box will make form fields editable.
- Your preferred name defaults to your legal name on file until changed.
- Re-check this box to revert your preferred name to your legal name.
c. Fill out the required fields to reflect the changes you wish to make to your preferred name on file.
d. Click the orange Submit button when finished, click the Save for Later button to save a draft without submitting, and click Cancel to discard any changes.
- Submitted requests are approved automatically.
Workday will accept the input/inclusion of diacritical marks, such as accented letters (e.g., Dalí). These will also carry over into your Portal profile, which uses your preferred name in Workday.

e. Once you have clicked Submit, you will see a confirmation screen. Click Done to complete.
- Edit Your Legal Name -
5. Access the Edit Legal Name Form
a. Navigate to the names screen in your student profile (reference steps 2-3 above if you need help getting there).
b. Within the Legal Name table, click the Edit button.
6. Fill Out the Edit Legal Name Form
a. Read the documentation requirements at the top of the form. Note that these requirements differ for different groups (Employees, Domestic Students, and International Students).
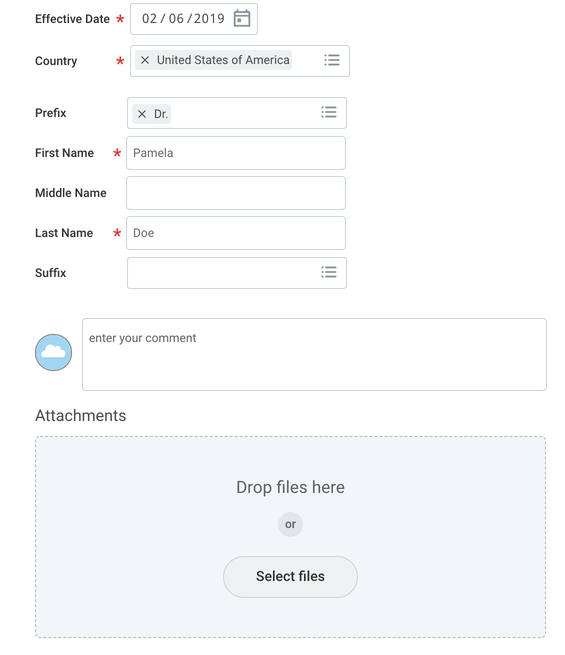
b. Fill out the required fields to reflect the changes you wish to make to your legal name on file.
Workday will accept the input/inclusion of diacritical marks, such as accented letters (e.g., Dalí).
- The Effective Date will default to the current date. Do not change this.
c. Under the Attachments section, upload the required legal documentation as outlined at the top of the form.
- Click and drag files from your computer into the box beneath Attachments. Alternatively, click the Select files button to browse and add files.
- Once a file has uploaded, additional informational fields will appear.
- Under Category, select Personal Information. This is a required field.
- Click the trashcan icon to the right of the thumbnail image to delete an attachment.
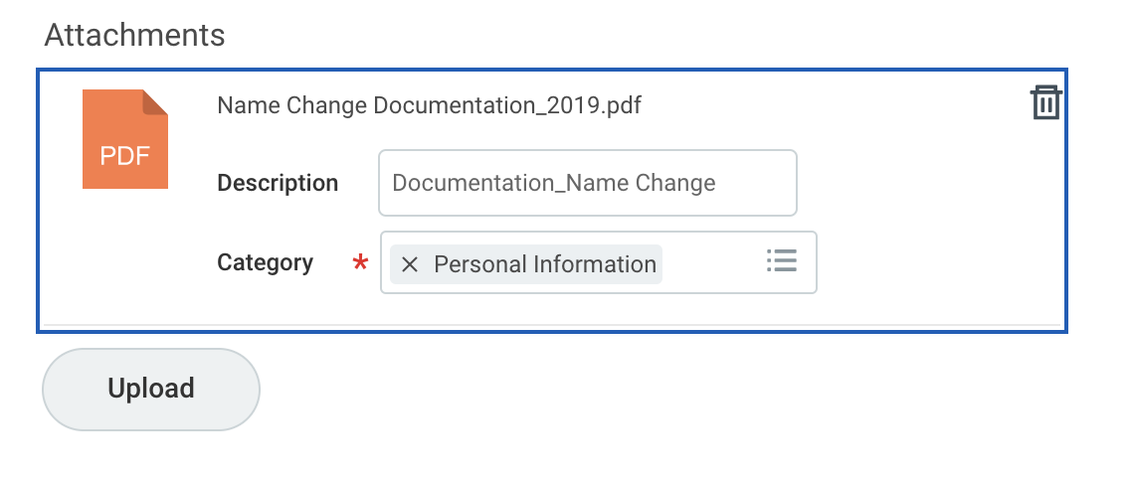
- Click the Upload button below to attach additional documentation as needed.
d. Click the orange Submit button when finished, click the Save for Later button to save a draft without submitting, and click Cancel to discard any changes.
- Submitted requests are routed through CCA Student Records (and/or International Student Affairs and Programs for international students) for processing and approval.
e. Once you have clicked Submit, you will see a confirmation screen. Click Done to complete.
7. Track a Pending Legal Name Change Request
a. Navigate to the names screen in your student profile (reference steps 2-3 above if you need help getting there).
b. The bottommost table on your screen summarizes changes made to your legal or preferred name in Workday.
- A submitted request will appear as a row in that table.
- Under the Status column, requests awaiting approval will be marked as In Progress.
- Approved requests (or requests that don’t require outside approval, such as changes to your preferred name), will be marked as Successfully Completed.
c. To view additional details for a legal name change request in progress, click the Edit button in the Legal Name table.
d. The table that appears on the resulting screen shows summary information on your request, as well as who the request has been assigned to for approval.
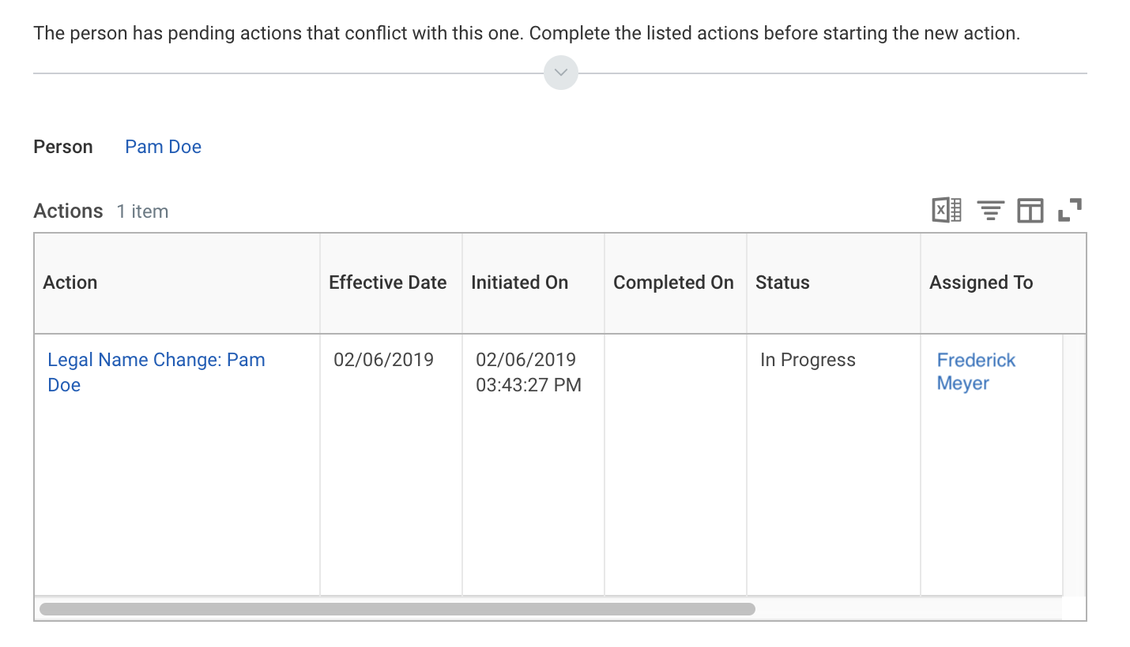
- When you submit a legal name change request, you will be unable to submit further changes to either your legal or preferred names until your initial request has been resolved.
8. Cancel a Pending Legal Name Change Request
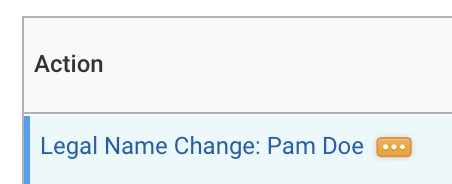
a. Navigate to the Edit Legal Name request page (see step 7 above if you need help getting there).
b. Hover over the request link in the Action column.
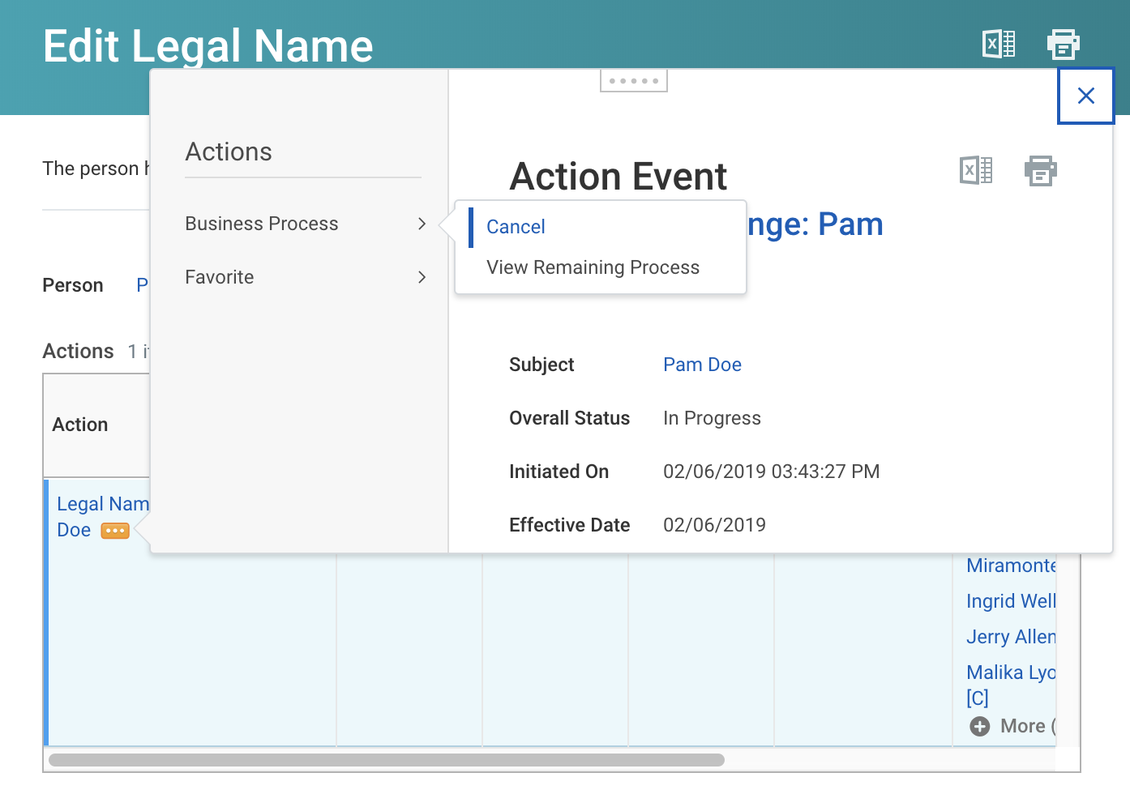
c. Click the Related Actions button, which appears as three dots to the right of the request link.
d. In the popup menu that appears, click Business Process.
e. Click Cancel.
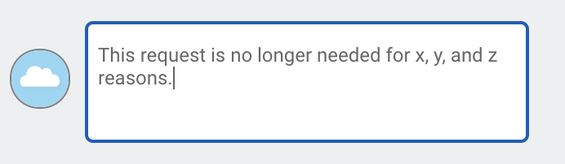
f. Fill in the Comments section of the resulting form.

g. Click Submit.
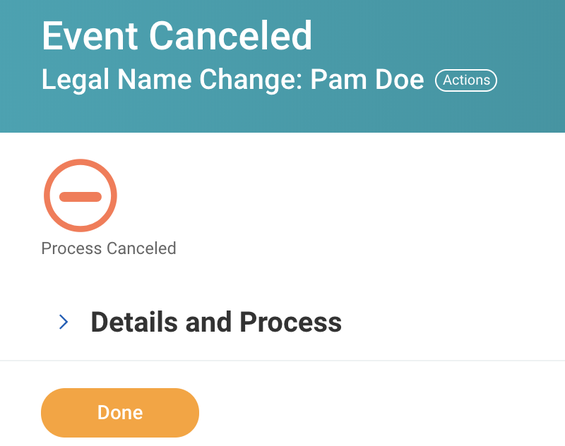
h. Once you have clicked Submit, you will see a confirmation screen. Click Done to complete.
9. Change Your Personal Information
a. From your student profile (reference step 2 above if you need help getting there), click the Personal tab on the teal sidebar.
b. Click the Personal Information subtab.
c. The resulting screen displays your personal information on file, including gender, date of birth, marital status, race/ethnicity, and citizenship.
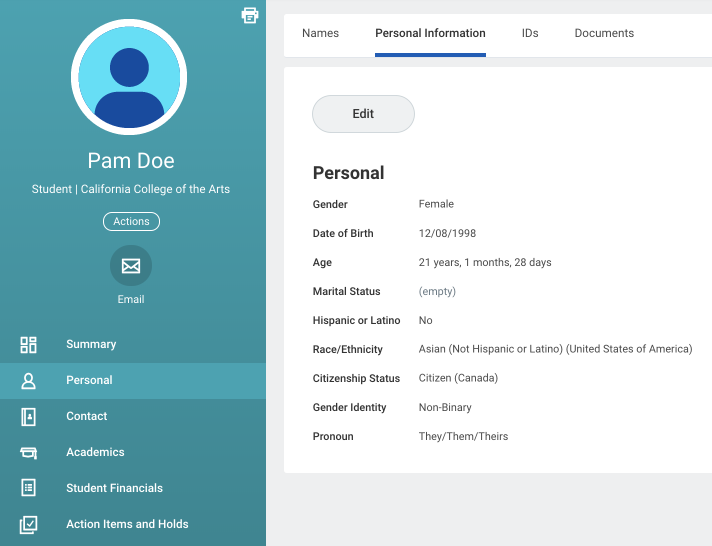
- For compliance reasons, Gender (sex assigned at birth or legally recognized sex designation) is a required field in Workday. This is a private field that is not visible to general Workday users
- Beginning in 2020, students can indicate one of three legally recognized sex designations as their gender in Workday: Female, Male, and X (Unspecified/Non-Binary/Intersex). The approval process for updating gender is similar to the process for updating legal name, with documentation required as specified in the Workday form.
- Students on the CCA insurance plan with gender X (Unspecified/Non-Binary/Intersex) and those whose gender in Workday may not align with their medical needs should immediately contact healthinsurance@cca.edu so that their gender can be reported in such a way as to minimize the likelihood of delays or denials of care. See the Usage Conventions for Student Name, Gender, and Pronouns for more information.
Note: Gender Identity and Pronoun are optional, public fields. If you do not make selections, these areas of your profile will not display.
- Because CCA fosters a culture in which no one makes assumptions about gender expression, we encourage all students to select a Gender Identity and designate a preferred Pronoun.
- You can update Gender Identity and Pronoun at any time, without documentation or departmental approvals.
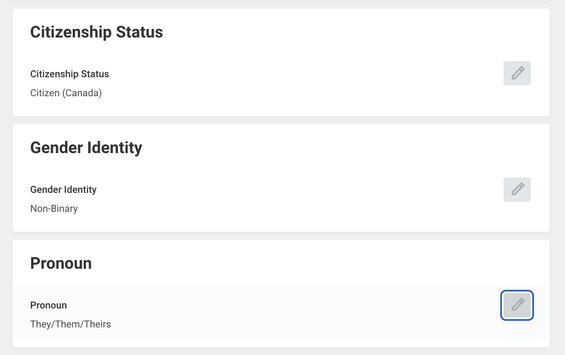
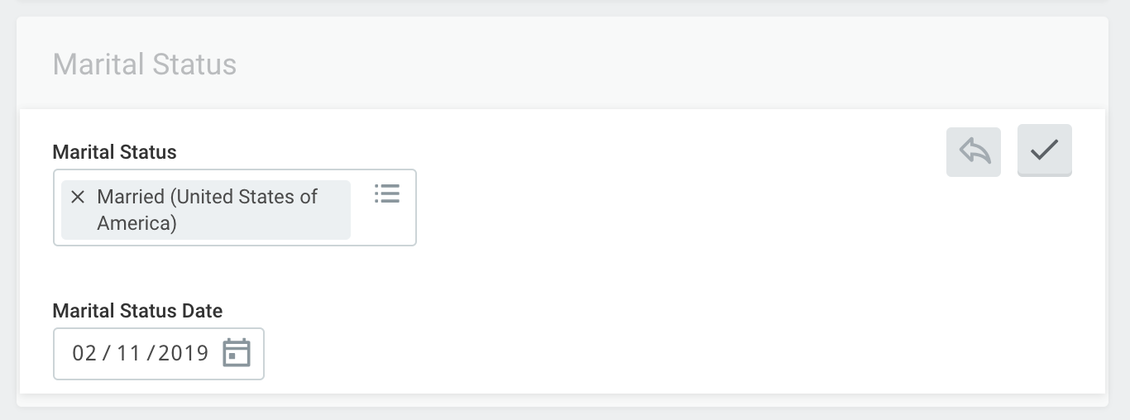
d. Click the Edit button to make changes to your personal information.
e. Read the documentation requirements at the top of the form.
- Changes to date of birth, race/ethnicity, citizenship, or gender require documentation and will route to CCA Student Records for approval.
- International students’ changes will also route to the International Student Affairs & Programs office.
- Gender Identity can be changed without any approvals.
f. If a section is already populated with information, click the pencil icon in the upper right corner of the section to edit. Otherwise, click the Add button on the left.
- Some fields are not editable from this screen, so no edit icons/functions will appear for those fields.
g. Click the checkmark icon in the upper right of the section to save changes or click the back arrow icon to discard changes.
h. Click the orange Submit button when finished, click the Save for Later button to save a draft without submitting, and click Cancel to discard any changes.
Protips
#1: Use the Workday search bar to initiate these requests without having to navigate menus. Type in Change My Preferred Name, Change My Legal Name, or Change My Personal Information, and click the corresponding task that appears.

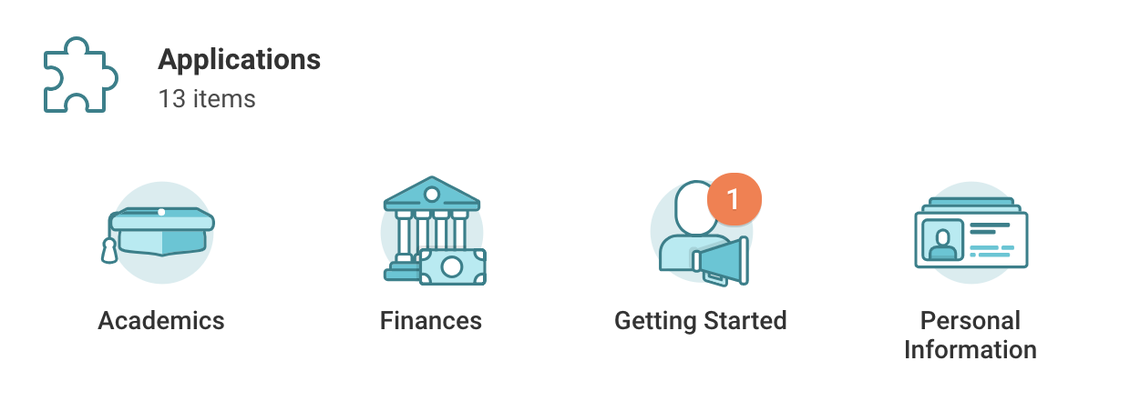
#2: The Personal Information worklet in the Applications section of the Workday home dashboard lets you do many of the same tasks available in your student profile, such as changing contact info, personal info, and legal and preferred names. Please note that the Personal Information worklet is only available to students with work-study positions.
What’s Next?
If you haven’t done so already, learn how to update your personal and emergency contact information.
Be sure to check out the other Workday Student help guides as well!