Install Zoom on Windows
Before you can host or join a Zoom meeting, you will need to download and install the Zoom client on your PC. If you are sent an email to join a Zoom meeting, you will be prompted to download the client if you do not already have it installed. This guide will show you how to install the client on a Windows-based machine.
1. Download the Installer
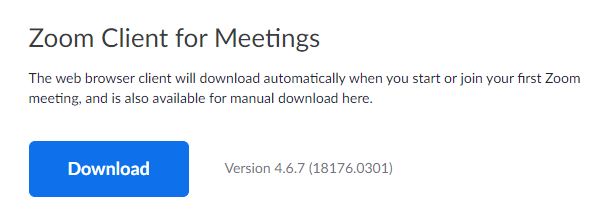
a. Go to cca.zoom.us/download and under the Zoom Client for Meetings header, click the Download button.
2. Install Zoom
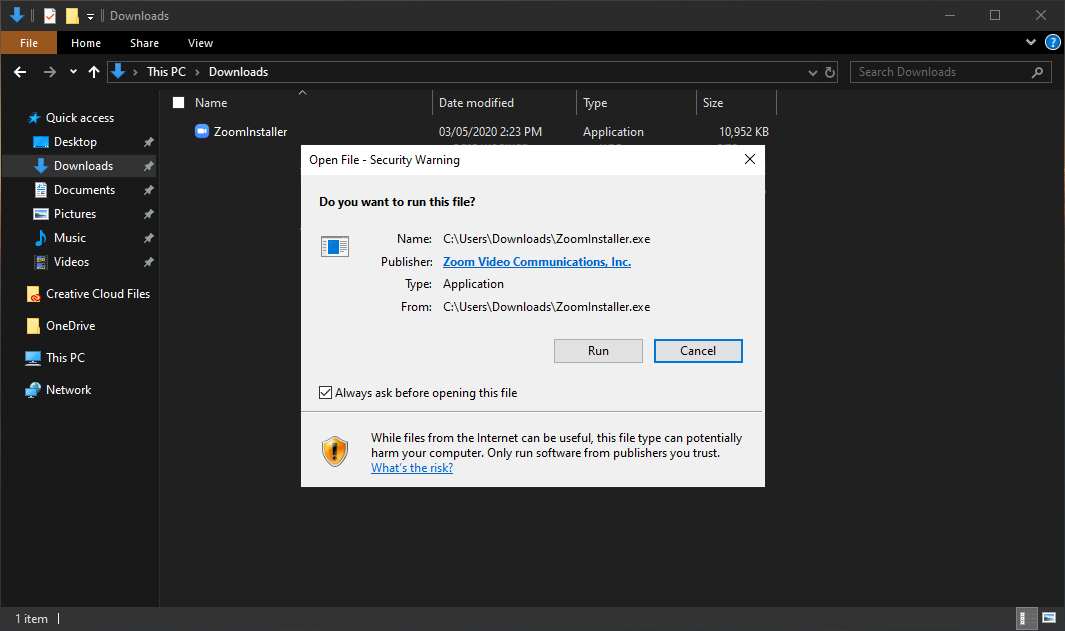
a. Once the download finishes, open your Downloads folder and double-click the installer to launch it.
b. You will be asked if you want to run the program. Click Run, and if asked if you want to allow changes to be made, click Yes
3. Get Started with Zoom
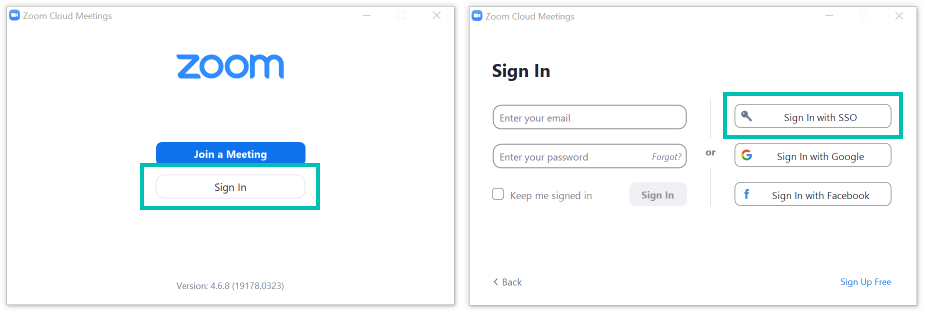
a. When opening the Zoom client for the first time, you'll need to log in with your CCA credentials. Click on Sign In and then click Sign In with SSO.
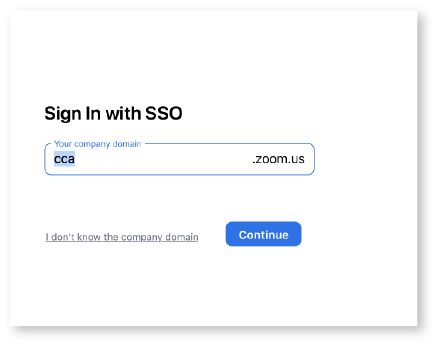
b. The following screen will prompt you for your company domain. Enter "cca," then click Continue.
c. A browser tab will open, directing you to CCA's single sign-on page. Enter your CCA username and password. After you enter your log-in credentials and verify the sign-in, Zoom will automatically create your account.
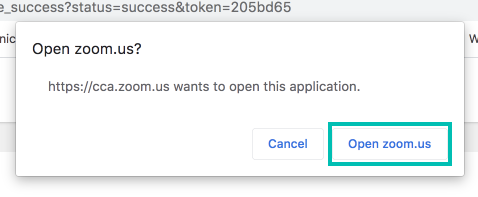
d. Depending on your browser and settings, you may see an additional prompt to Open zoom.us. Confirm, and the Zoom application will open back up.
d. After that, you're done! Zoom is ready for you to host or join a meeting.