Images + Documents
All images and documents that are uploaded to Portal are saved in an associated library within Wagtail. Within the Images and Documents libraries are divisions called Collections, of which there are currently five:
- Root - Generic collection.
- Academics - Files related to academic programs and studies.
- Campus - Files that are related to on campus activities, events, and facilities.
- Help - Files that pertain to documentation or tutorials.
- Shops - Files that are related to shops, studios, and labs.
- Teaching Technologies - Files related to platforms/tools used for teaching at CCA, such as Moodle and Mural
Editors' access to view, edit, and use certain collections depends on their individual page permissions.
If editors wish to use or edit files they did not upload themselves, they should reach out to the owning department (images and documents should be tagged with departmental info. See the "Uploading" section below for more information).
Images vs. Documents
Though images and documents have similar storage properties, they have different functionality, editing, and display options.
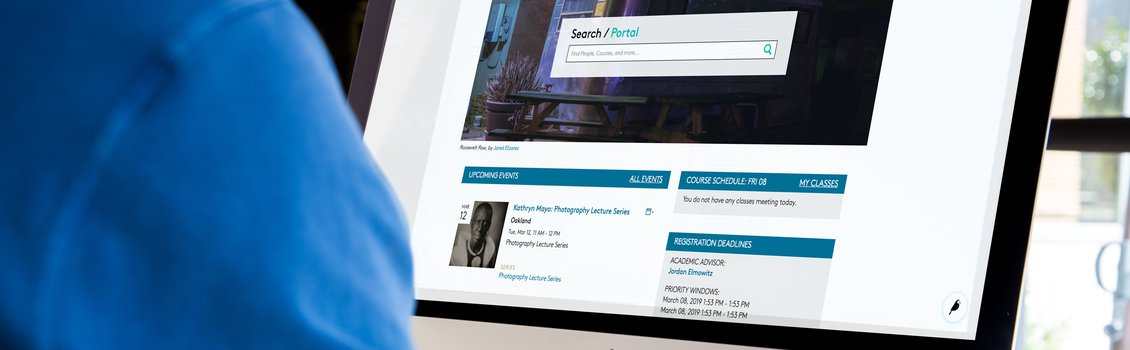
See the Page Content documentation for detail on how the inline Image block functions. Images are used across all sorts of other Wagtail fields, like page thumbnails, image grid items, and sidebar item links.
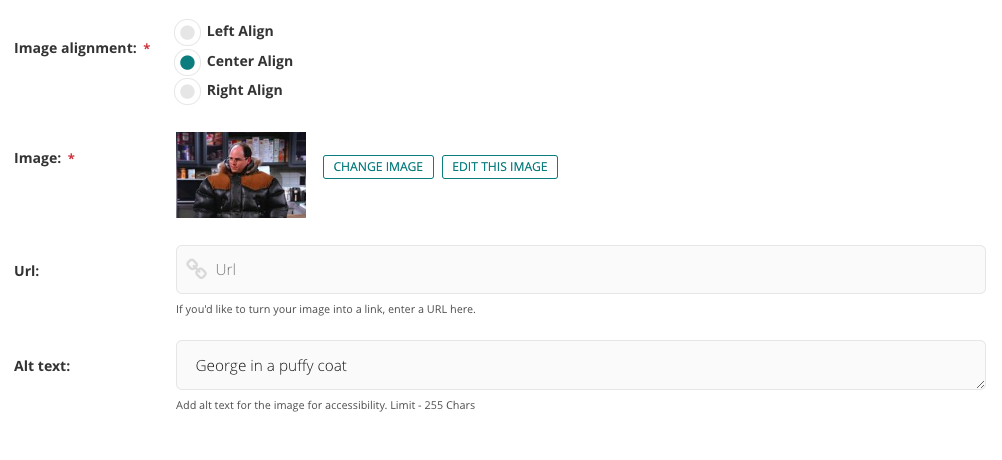
Images in Wagtail, once selected will offer additional functions, like Change Image (reopens the image-picker menu) and Edit This Image (opens the image editor in a separate tab).
Documents, on the other hand, are always accessed/displayed on Portal by linking.
- When a PDF document link is clicked by a Portal user, the document file opens in browser view (but can be downloaded as well, if needed).
- DOC and DOCX document links will automatically download the file when clicked.
Uploading
Users can upload new images or documents to their respective libraries in many different ways. Any image or document element in the Wagtail editor will pull up the image- or document-picker menu, which includes the upload functionality.
To upload an image while editing a Portal page:
- Navigate to a field that includes an image element, such as the inline Images block or the Banner Image field.
- Click the Choose an Image button to pull up the image-picker menu.
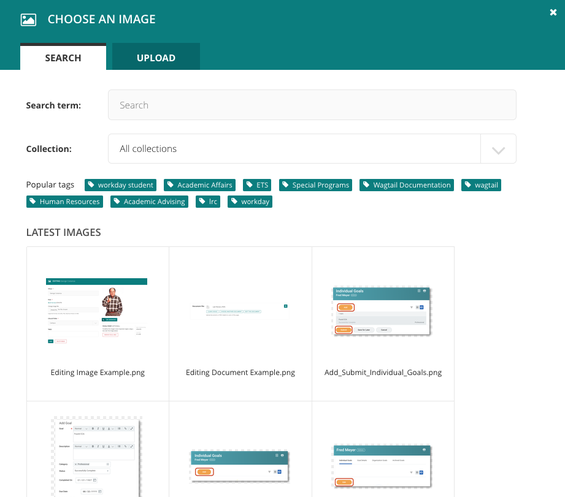
- The image-picker has two tabs: Search and Upload. Click on the Upload tab.
- The Upload tab provides four content inputs:
- Title (required), the name of your image as displayed in the Images library (appropriate, descriptive titles make images easier to find again later).
- File (required), the PNG or JPG image file selected from your computer.
- Collection (required), the content bucket in which the image falls, determining who has access to the image in Wagtail as well. See the page intro above for a breakdown of available Collections.
- Tags, or customizable keywords that make the image easier to find in image-picker search results.
- Editors are expected to tag images with their department/content area and relevant artist/author credits. See the images style guide for tips on image selection, copyright, and usage.
- When you have filled in these fields, click on the teal Upload button. Your image is now saved to the Wagtail Images library and selected for the in-page field/element.
To upload an image directly into Wagtail's directory:
- Click the Images tab in the gray left-hand sidebar to open the Images library.
- Click on the button in the top right-hand corner, labeled Add an Image.
- On the resulting screen, drag and drop your desired image into the grey area of the page or click on the button labelled Or Choose from Your Computer.
- Once you've selected an image, a few new input fields will appear, including Title (required), Collection (required), and Tags.
- When finished, click on the Update button. A green banner at the top of the screen will indicate that your image was successfully uploaded.
To upload a document while editing a Portal page:
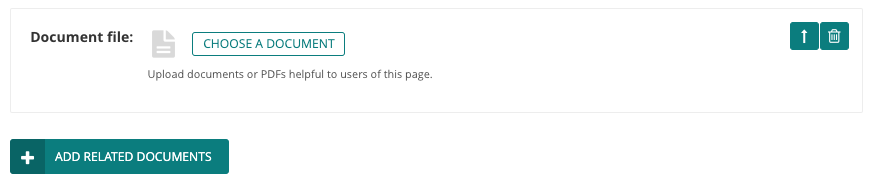
- Navigate to a field that includes a document element, such as the Add Related Documents button under Resources. Click this button.
- Click the Choose a Document button to pull up the document-picker menu.
- The document-picker has two tabs: Search and Upload. Click on the Upload tab.
- The Upload tab provides four content inputs:
- Title (required), the name of your document as displayed in the Documents library and which will display in document link text on Portal.
- File (required), the document or pdf file selected from your computer.
- Collection (required), the content bucket in which the document falls, determining who has access to the document in Wagtail as well. See the page intro above for a breakdown of available Collections.
- Tags, or customizable keywords that make the document easier to find in document-picker search results. Editors are expected to tag documents with their department/content area and relevant artist/author credits.
- When you have filled in these fields, click on the teal Upload button. Your document is now saved to the Wagtail Documents library and selected for the in-page field/element.
To upload a document directly into Wagtail's directory:
- Click the Documents tab in the gray left-hand sidebar to open the Documents library.
- Click on the button in the top right-hand corner, labeled Add a Document.
- On the resulting screen, drag and drop your desired document into the grey area of the page or click on the button labelled Or Choose from Your Computer.
- Once you've selected a document, a few new input fields will appear, including Title (required), Collection (required), and Tags.
- When finished, click on the Update button. A green banner at the top of the screen will indicate that your document was successfully uploaded.
Searching for Images and Documents (and Accessing the File Editor)
Wagtail now has a robust collection of images and documents, thanks to the contributions of our content editors across all CCA departments!
As mentioned above, page editors who want to use an image or document they didn't upload should reach out to the department/owner of the file for permission.
Editors can utilize the Images or Documents library search to check if a file has already been uploaded before uploading a file themselves.
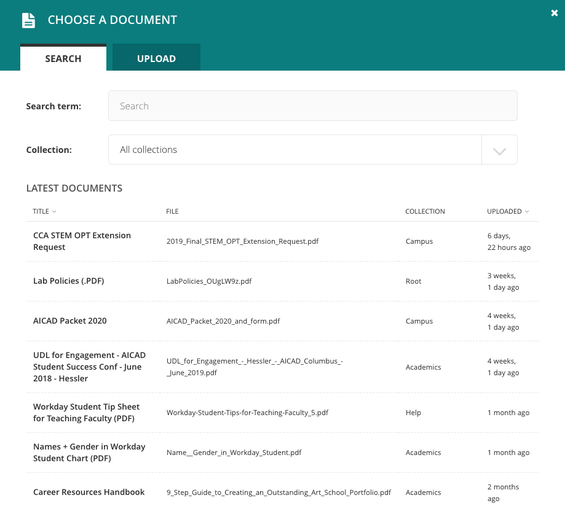
Search for a File from the Wagtail Images or Documents Library
- Click on the Images or Documents button located within the dark grey sidebar to open the appropriate library.
- The search view will appear by default, with the most recently uploaded files appearing first. Use the search bar to find files by title or tag. You can further filter items using the Collections dropdown.
- Click on an image or document to access the image/document editor (more on this screen below).
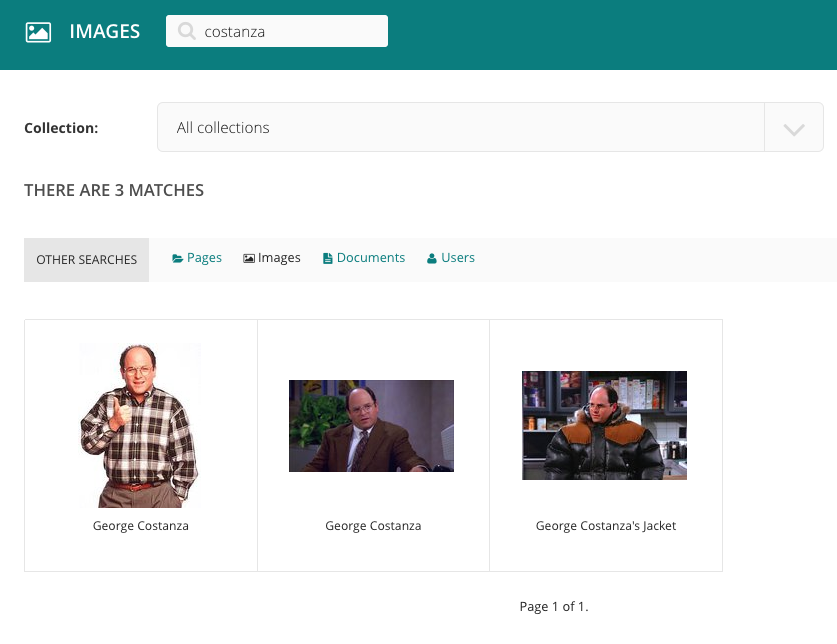
Search for a File While Editing a Portal Page
- Navigate to or add a field that includes a document or image element.
- As appropriate, click on the Choose an Image or Choose a Document button to pull up the image- or document-picker.
- The picker Search tab will open by default, a view which includes the most recently uploaded files. Use the search bar to find files by title or tag. You can further filter items using the Collections dropdown.
- Click on an image or document to select for that element.
- Once selected, you'll have three new options:
- Clear Choice, which reverts the element to a blank instance.
- Choose Another Document/Image, which reopens the document- or image-picker menu.
- Edit This Document/Image, which reopens the file editor (in a new tab).
Editing
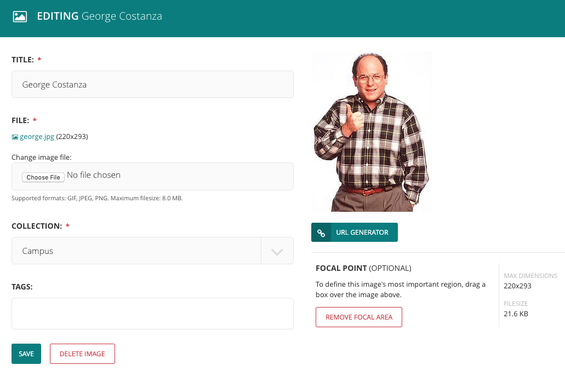
The image and document editor pages essentially offer the same four fields presented to you when uploading the file: Title (required), File (required), Collection (required), and Tags.
These fields can be changed at any time, by any person with access to the specific Collection the file belongs to. Out of consideration to content editors across departments, please refrain from editing images or documents that you did not upload yourself. If a change needs to be made, please reach out to the department that uploaded the file or upload a new instance of that file.

Focal Point
The Wagtail image editor offers some additional editing capability.
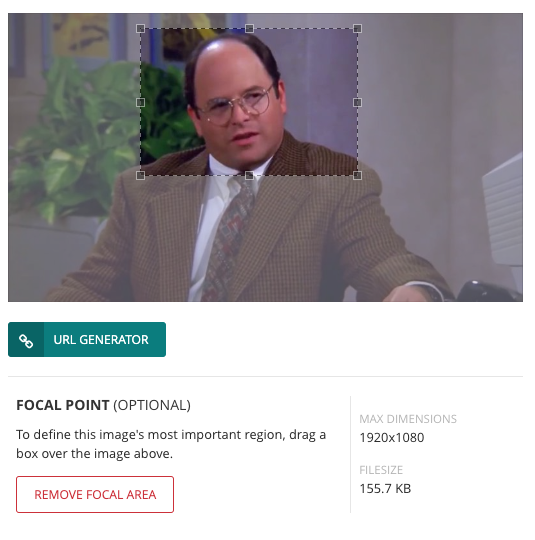
Wagtail does not have a native image cropping feature, and often images do not render on live Portal as expected. This can happen if the selected image is too large for a given frame. If you can, crop your images to the intended frame size/shape before uploading them to Wagtail.
Additionally, Wagtail provides a Focal Point tool to assist with image masking, essentially giving Wagtail specific instructions about what portion of an image should not be left out of the frame when the image file doesn't match the image frame size/shape.
- This is relevant in cases where an image renders at a specified aspect ratio, such as banner images, page card thumbnails, or sidebar items.
To Add a Focal Point:
- Navigate to an image's editor page (steps outlined in "Searching for Images and Documents (and Accessing the File Editor)" above).
- Hover over the preview of the image, then click and drag along the area you would like Wagtail to "focus on" (i.e. what Wagtail should try not to exclude from the image frame when rendering).
- Click and drag the boxes along the dotted line to fine-tune your focal point shape.
- Once the selection is complete, click Save. If you’d like to remove the focal area completely, simply click Remove Focal Area underneath the image preview.
Important Note: Once again, using a focal point is not like cropping an image with Photoshop. It is more akin to telling Wagtail which point of the photo you’re most interested in showing, and it can only approximate use of that point as a bias for what the frame will focus on.
Related Pages
- Wagtail Guide: Portal Basics
- Portal Page Architecture
- Accessing Wagtail
- Navigating Wagtail
- Page Types (Templates)
- Creating, Saving, + Publishing Pages
- Page Privacy, Unpublishing, + Deleting Pages
- Moving Pages and Reordering Content
- Page and Site History (Formerly Page Revisions)
- Page URLs
- Basic Page Content
- Basic Page Body Blocks
- FAQ Page Content
- Images + Documents