
Page Types (Templates)
As mentioned in our Portal Page Architecture documentation, there are a few different page templates that content editors will interact with in Wagtail. Each template has different purposes and properties, so please refer to this page if you're unsure of the differences.
Landing
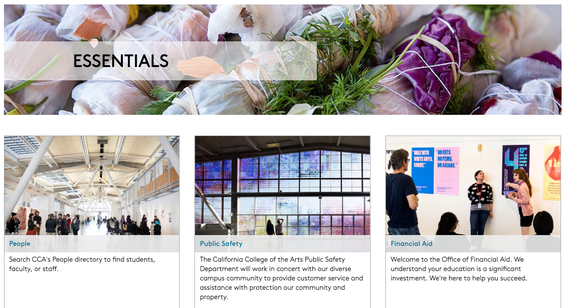
A Landing page is the page that Portal users will see when they click on any of the banner items. An example of a Landing page is the Essentials Landing page.
Landing pages will be made of a banner image, title, and a series of cards. The "cards" appearing on a Landing page are automatically generated based on the published Section pages within.
Landing pages act as a meeting grounds for the many different Section pages that live on Portal. If anything, it serves more as a navigational structure than a page with detailed content and information.
Section
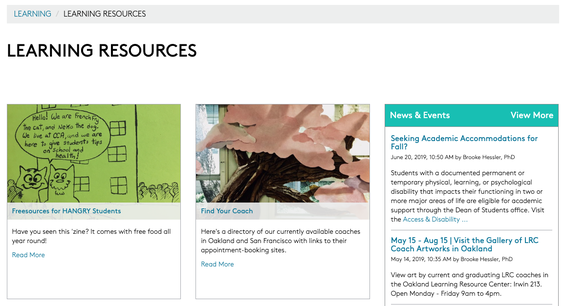
Section pages represent departments, content areas, resource clusters, teams, initiatives, and organizations at CCA. An example of a Section page would be the Career Development Section page or the Learning Resources Section page. All Section pages are represented by a card thumbnail image and card text within their "parent" Landing page. These same cards will also display when using Portal's search functionality.
In terms of content options, Section pages are somewhere in between a Landing page and a Basic page. Section pages dedicate most of their space for cards (like Landing pages), but they also support an introductory text field, sidebar links (like Basic pages), and sidebar widgets for announcements and/or a Google calendar.
Here's how you add a Google calendar to your section page:
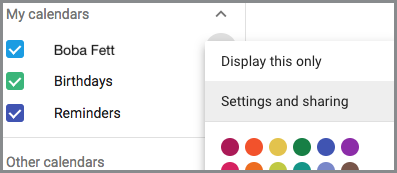
- Go to calendar.google.com
- Under My calendars, click the options button (three vertical dots) to the right of the Google calendar you wish to use.
- Click Settings and sharing.
- On the resulting page, scroll down to Integrate calendar.
- Locate Calendar ID, and copy the long string beneath (it should look a bit like a long email address).
- Back in Wagtail, access the Settings tab in the page editor.
- Paste the copied ID into the Google Calendar ID field.
- Click Save, and your calendar is connected! If you ever want to disable your calendar, just remove its ID from Wagtail.
Basic

Basic pages house almost all of the information and content available on Portal. Its name is deceiving because its functionality is far more robust than all of the other templates mentioned in this documentation. An example of a Basic page would be this page! A couple other examples would be the Career Development Staff page or the Universal Design for Learning page.
As you'll see, all of these pages look fairly different due to the many different "streamfield" options (or blocks of content) on a Basic page. These options are listed below. Indented items are individual components of or options within each field.
- Title
- Page Card
- Card Thumbnail Image
- Card Text
- Banner image
- Body
- Subheading
- Paragraph
- Embed
- Image
- Break
- Table
- Image grid
- Note
- Resources
- Related links
- Related pages
- Related documents
- Sidebar items
These functions are documented further in Basic Page Content.
FAQ
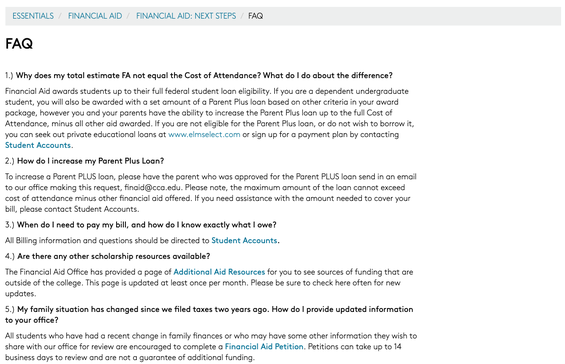
The FAQ page template is specifically designed to host - you guessed it! - questions and answers. FAQ pages can be created under basic pages, shops pages, or academic programs pages.
Because FAQ pages are designed for a specific type of content, the available content fields are limited to:
- Title
- Page Card
- Card Thumbnail Image
- Card Text
- Body
- Section - Split up subsections of your FAQ page, designating a title that applies to the questions and answers below it.
- Faqitem - A block consisting of a Question and an Answer (both required components).
Find out more about these fields and best practices for using the template by reading our FAQ Page Content documentation.
Announcements
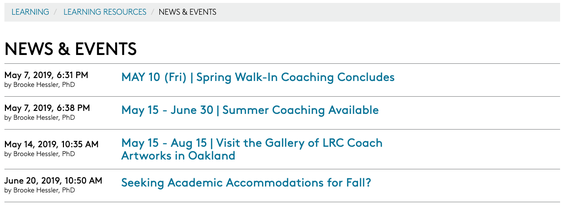
Each Section page (and Academic Program page) comes with the option of a child Announcements page. The Announcements page will appear as a sidebar widget on its "parent" page, alongside any cards or content.
The Announcements page itself is essentially a folder for individual "posts" nested beneath. Each child page (or Post page) you create and publish underneath the Announcements page will automatically display as a snippet on the Announcements widget, along with a link to the full Post. Each Post page has its own unique URL that can be used or shared in social media promotions, etc.
Due to its purpose as a "folder," Announcements pages only require the input of a title. By contrast, the children (Post pages) of an Announcement page support titles and body fields, similar to a Basic page.
To begin creating your Announcements widget, select Add Child Page (from your Section or Academic Program page) and select “Announcements.” You may only create one Announcements widget per section. Once you create an Announcements page, you'll notice that this option disappears when you click Add Child Page.
Title your Announcements page, then save it.
To begin populating the Announcements widget with child pages, move your cursor over your newly-created Announcements page in the Wagtail admin view. Then click Add Child Page.
Now you can start creating Post pages that will populate the Announcements widget.
Type in your post text and title on the newly created page. Keep in mind that your Title will be the heading/link displayed in the Announcements widget, and only a snippet of text will display in the widget.
Promote Tab
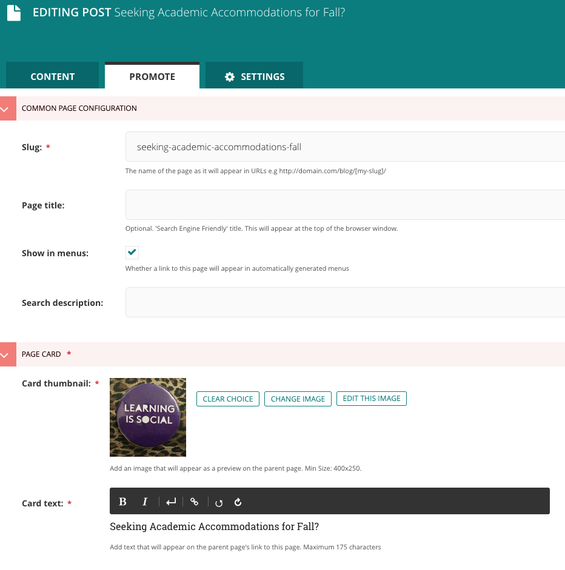
Just like Basic pages, Posts have required fields that need to be filled in order for the page to be published. However, not all of these fields are apparent at first glance. Navigate to the top of the page and select the 'Promote' tab. There, you'll see three required fields:
- Slug (should be automatically populated based on the Post's title; customization is not recommended due to search engine implications)
- Card thumbnail
- Card text
If you try publishing an announcement post without filling out these fields, you'll see a red message banner at the top of the page saying, "The page could not be created due to validation errors."
Card Thumbnail + Text
Because individual Posts can be found via Portal's search engine, card thumbnails and text are important for users to get a sense of whether a page or post is relevant to them. Multiple departments and programs use Announcements pages, so please consider how these fields can differentiate your Post from the multitudes that can be found on Portal.
Related Pages
- Wagtail Guide: Portal Basics
- Portal Page Architecture
- Accessing Wagtail
- Navigating Wagtail
- Page Types (Templates)
- Creating, Saving, + Publishing Pages
- Page Privacy, Unpublishing, + Deleting Pages
- Moving Pages and Reordering Content
- Page and Site History (Formerly Page Revisions)
- Page URLs
- Basic Page Content
- Basic Page Body Blocks
- FAQ Page Content
- Images + Documents