Update Your Legal Name
Before you begin
How is my legal name used?
Your full legal name will appear in any official document available or generated from Workday.
Can I keep a different name on file?
Workday supports the use of a preferred name as well, a name of your choice that can be entirely distinct from your legal name.
Until otherwise specified, your preferred name defaults to your legal name.
Where does preferred name display?
In most contexts, your preferred name will display within Workday (other than official documents that require the use of your full legal name). Your preferred name is also what displays within your Portal directory entry and profile.
Are legal name changes the same for everyone?
Documentation requirements differ for different groups (e.g., employees, domestic students, and international students). However, if you have more than one role (say you're both a student and an employee), you'll share your legal and preferred names across roles.
Update your legal name
1 Run the 'Change My Legal Name' task
You can access the 'Change My Legal Name' task here.
You can also find this task:
- By typing 'change my preferred name' into Workday search.
- From the Names sub-tab within the Personal tab of your worker profile.

2 Cancel pending name change (if needed)
You cannot make any updates to your name until a pending name change is resolved or canceled. See the steps below for details.
3 Read the form instructions
The form instructions detail requirements for documentation attachments.
Documentation requirements differ for different groups (e.g., employees, domestic students, and international students).
4 Fill out form fields as needed
- Required fields are marked with a red asterisk.
- The 'Effective Date' defaults to the current date. Typically, you will not need to change this.
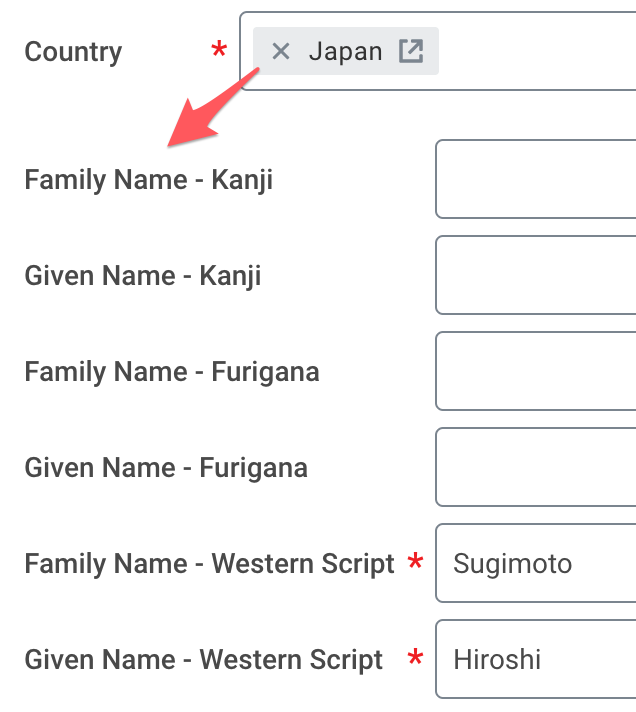
- The 'Country' defaults to 'United States of America.' If you select another country, the form fields may update to reflect different naming conventions.
Workday will accept the input/inclusion of diacritical marks within the name fields, such as accented letters (e.g., Dalí or Núñez).
5 Upload required documentation
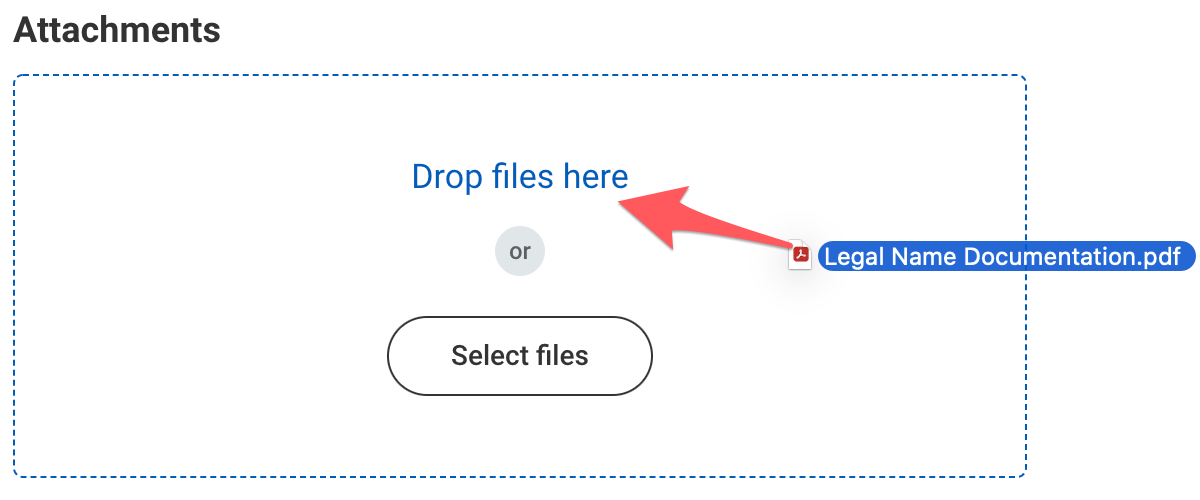
Under 'Attachments,' upload the required legal documents as outlined in the instructions.
You can drag and drop or 'Select files' from your computer.
6 Categorize attachment as 'Personal Information'
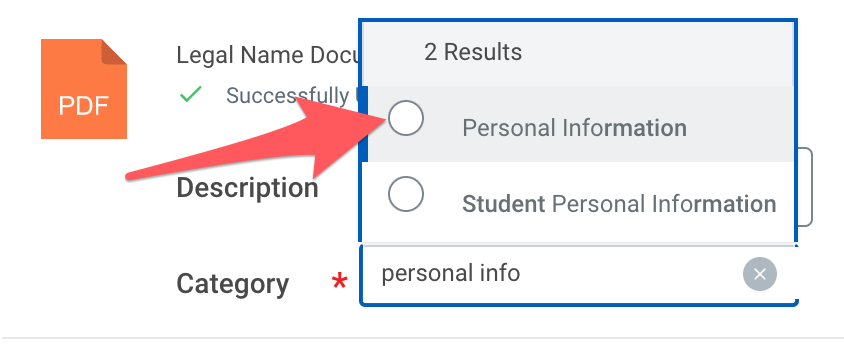
Once a file has uploaded successfully, select 'Personal Information' from the Category dropdown.
7 Upload additional attachments (as needed)
Repeat steps 5 and 6 as needed to upload additional attachments.
You can delete an uploaded attachment by selecting the trash icon.

8 Submit the form
Review the form fields and attachments, then select 'Submit.'
- Employees' submitted legal name updates route to Human Resources for processing and approval.
- Students' submitted legal name updates route to Student Records and/or International Student Affairs and Programs (international students only) for processing and approval.
The submission confirmation screen shows who will review and approve your request.
Select 'Done' on the confirmation screen to exit the task.
Track a pending legal name change
You cannot make further updates to legal or preferred names if you have a legal name change pending. This includes both submitted requests that have not been approved and saved but un-submitted requests.
Follow these steps to resolve or cancel a pending legal name change.
You can also use these steps to track the status of a pending request.
1 Run the 'Change My Legal Name' or the 'Change My Preferred Name' task
- You can access the 'Change My Legal Name' task here.
- You can access the 'Change My Preferred Name' task here.
You'll see your pending legal name change request, if you have one, on the resulting screen.
2 Review your pending request summary
On the summary table, you can find things like request 'Status' and who next steps have been 'Assigned To.'
3 Review your pending request in detail
Click the link in the 'Action' column to view a more detailed description of the pending request, including next steps, remaining process, and process history.
Navigate back to the 'Change My Legal Name' or 'Change My Preferred Name' screens when you've finished reviewing your request.

Cancel a pending legal name change
1 Run the 'Change My Legal Name' or the 'Change My Preferred Name' task
- You can access the 'Change My Legal Name' task here.
- You can access the 'Change My Preferred Name' task here.
You'll see your pending legal name change request, if you have one, on the resulting screen.
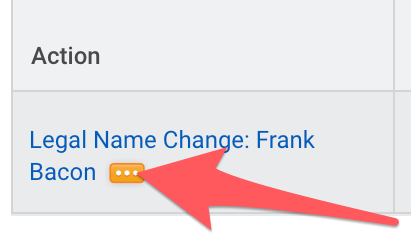
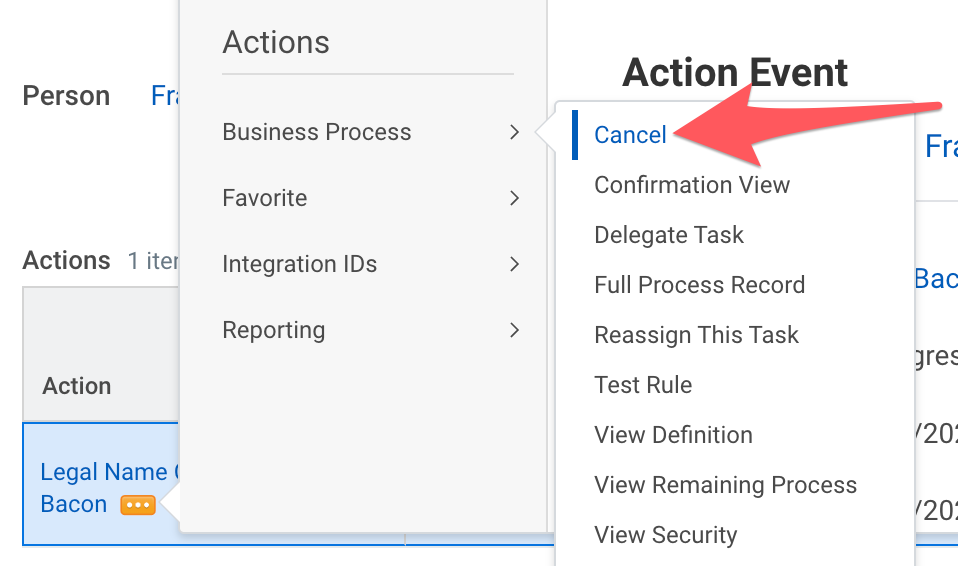
2 Open 'Related Actions' for the legal name change 'Action'
To open the 'Related Actions' menu:
- Hover over the link in the 'Action' column (do not click the link itself).
- Select the Related Actions icon (a box with three dots to the right of the link).
3 Initiate the cancelation process
You can do this from the 'Related Actions' popup menu:
- Hover over the 'Business Process' tab.
- Select 'Cancel' from the resulting mini-menu.
4 Provide an explanation for the cancelation
Use the 'Comment' field for this.
Your explanation can be as brief as 'no longer needed.'

5 Submit the cancelation request
Select 'Submit' to confirm cancelation of your pending legal name change.
