Set Permissions for a Third Party to Access Your Student Information
As a student, you have the ability to grant permission to a parent, guardian, or other third party to view and access particular information and Workday functions on your behalf.
There are a few steps you'll need to follow in order to set up permissions for a third party user. After following these steps, the third party user will have to follow their own set of steps in order to create and activate their account.
These instructions pertain to granting access for a third party to view academic and financial aid information only. To grant a third party access to view charges and make payments on your account, please see these instructions: Add an Authorized User to Make Payments on Your Account - Step by Step Guide
Student: Set Up Third Party and Grant Permissions
1 Navigate to your Friends and Family page
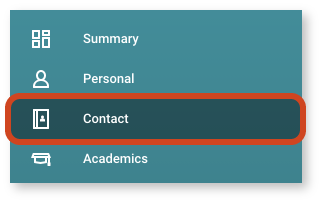
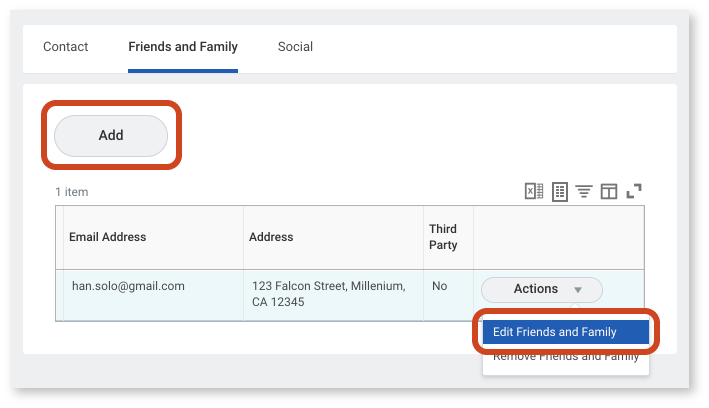
Go to your Friends and Family page (you can find it under the Contacts tab in your student profile; this is where you add/manage emergency contacts as a student).

2 Edit or Add Contact
Edit an existing contact (from the Actions menu on the rightmost table column) or Add a new one.

3 Enable as Third Party User
Check the Proxy User checkbox at the top of the page and make sure that the contact has an email address added.

4 Save Changes
5 Manage Permissions
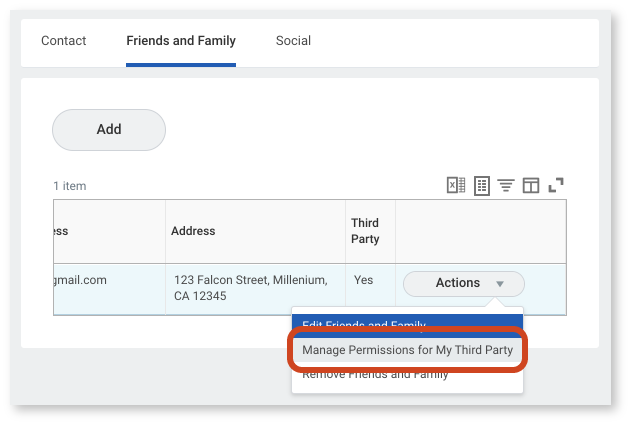
Back on the Friends and Family page, click the Actions button and select Manage Permissions for Third Party. You'll only be able to choose this option for contacts designated as a Third Party or Proxy User (see steps above).

6 Confirm
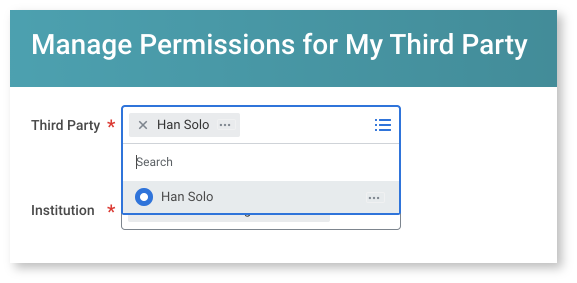
Confirm the third party for whom you are managing permissions, then click OK to proceed.

7 Select Permissions
Select the appropriate permissions for the third party user, then click OK to proceed. Available options include:
- View Financial Aid
- View Current Classes
- View Student Grades
8 Complete FERPA Waiver
Complete the FERPA waiver on the following screen.
- To complete the form, fill out the Purpose of Waiver field with a short description of why you are granting the college permission to release the selected information to this third party.
- Check the Confirm checkbox.
- Click Submit to complete the process.
Now that you've granted third party permissions in Workday, that third party will be able to follow the steps below, which will grant them access to login to Workday and view the information you've made available for them.
A link to the activation instructions will be sent to their email on file in Workday. You can also refer them to the instructions below.
Third Party: Create CCA Account and Login to Workday
1 Look for email with activation instructions
After your student has enabled you as a “third party user” and completed all of the steps above, you will receive an email with instructions for these next steps:
- Navigate to https://accounts.cca.edu/activate/third-party. Enter the correct information and complete the process to create a CCA single sign-on account.
- Log in to Workday at https://workday.cca.edu using the new account credentials.
These steps pertain to third party access to academic records and financial aid information only.
You will only be able to view information that the student has selected to make available to you. Students can update and/or revoke this access at any time.