
Uploading Art to Your Alumni Gallery
As a CCA alum, you can showcase your work by uploading images and even videos to your alumni profile gallery. Read the guide below for more information on how this feature works.
The work you upload to your alumni gallery displays on your alumni profile page. These galleries are accessible to other CCA alumni and select staff and faculty with access to the alumni directory.
Only staff, faculty, and student galleries are included in the Gallery Spotlight that displays on Portal's home dashboard.
Jump to a section
Create your gallery
Before you can begin editing your gallery, go to your alumni profile.
You need to log in to Portal in order to do so (if you don't have an activated account, you can create one here).
Once you've gotten to your alumni profile, click the Create Your Gallery button.

You'll be redirected to the gallery editor, where you can start adding or editing gallery content.
If you graduated in 2020 or later, you may have had gallery work uploaded to your Portal student profile. If so, you'll have a one-time option to copy over content into your alumni gallery. After clicking Create Your Gallery, follow the instructions on the screen to choose whether or not to import your student profile content.
Accessing the gallery editor
Once you've created your alumni gallery, you can access the gallery editor from your alumni profile page by clicking the Edit Your Gallery button (this replaces the Create Your Gallery button).

See the sections below for detailed instructions for adding and editing images and other gallery fields.
Add a Narrative Statement
Get started by filling out or editing your Narrative Statement rich text field.
- Use this field to highlight specific projects, themes, or works. This text displays on your alumni profile page, just above your gallery images.
- You can utilize headings, lists, links, and text styling for additional complexity.

Upload an image
1) Scroll down to the image upload form. Upload an image file from your computer (must be under 5MB).
- There is only limited support for uploading animated GIFs, which should be much smaller than the 5MB maximum supported for other image types.

2) Fill in a title for the work.
3) Fill out any other fields as desired.
- If you’re uploading a video, you’ll need to fill in the Video URL field, and the uploaded image (required) will display as a gallery “preview” for your video. See the Upload a Video section below for details.
4) When you’ve completed the form fields, click Save Image to finish the upload.

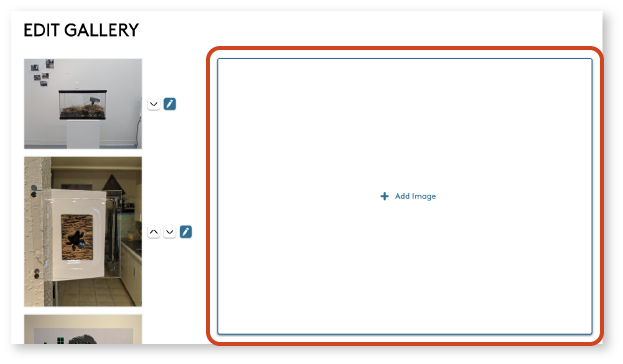
5) Click the Add Image button to add a new image file.
Upload a video
Adding a video to your gallery is very similar to adding images, except that you need to provide a video URL from one of the supported video platforms.
1) Upload an Image File, which will act as a "preview" image for your video and displays in your profile's default gallery view.

2) In the Video Link field, enter a link from Vimeo, DailyMotion, or YouTube. Videos on other platforms will not be viewable from the profile gallery feature.
3) When you’ve completed the form fields, click Save Image to finish the upload.
To view a video on a published gallery, click on the preview image, which will open the video in the gallery's detailed/slideshow view (see the Gallery display section below for more details).

Save gallery edits
When you're finished uploading images, click Save Changes to save all changes to your gallery.

To discard changes you've made to your gallery, click Back to Profile instead.
Clicking either button will take you back to your profile page, where any saved gallery changes will now be visible. (Remember that you can always jump back into the gallery editor by clicking the Edit Your Gallery button from your profile page!)
Edit uploaded images
1) While in your gallery editor, uploaded images display in the sidebar. Click the pencil icon next to any image to edit its information.

- You can edit any of the information about the image, but you will not be able to swap out the image file itself.
- Instead, add new images and delete previously uploaded ones as needed.
2) To remove an uploaded image, click the Delete button. Otherwise, click Save Image to retain changes or Cancel to discard them.

3) Click Save Changes after finishing edits to retain any updates you've made to your gallery.
Note: You will not be able to toggle between uploaded images while you are in the image editor form. Exit out of the form by clicking Save Image, Cancel, or Delete, then click the pencil icon for the image you’d like to edit.
Reorder images
Your gallery displays images based on their order in the gallery editor.
1) Shift the order of an image by clicking the up or down arrow button next to its thumbnail in the gallery editor.

2) Click the Save Changes button to retain any changes and exit the gallery editor.
Featured Image Functionality - Coming Soon!

You may notice the featured image button in the lower-right corner of each uploaded image. The featured image doesn't actually affect your gallery display yet. Additional functionality is coming soon!
Gallery display
Your saved gallery displays in the bottom portion of your alumni profile.
Default Gallery Display
Desktop - The default display is a tiled grid, with three images (maximum) per row.
Mobile - The default display is a single, scrollable column.

Note: Your saved gallery displays in a “tile” format, designed to minimize blank spaces between images (often the case if their aspect ratios vary greatly). While your gallery will typically display images in your designated order, some reordering may occur automatically in order to eliminate gaps between uploaded works.
Detailed/Slideshow View
You can also pull up a "detailed view" of any item by clicking on the image thumbnail or by clicking the View Gallery button.

From the detailed view you can see uploaded images at full size and view any information—description, date(s), collaborators, etc.—entered in the gallery editor. You will also be able to view video content from the slideshow view.

Use the left and right arrows to toggle between gallery images/videos.
You can hide/unhide image information by clicking the teal down/up arrow hovering above the information card.

Click the play/pause button to start or stop the "slideshow view," which automatically advances to the next image every 5 seconds when playing.

Click the “X” icon to exit the detailed gallery view.

Browsing alumni galleries
Alumni galleries are only accessible to other CCA alumni, as well as select faculty and staff with access to the alumni directory.
Browsing fellow alumni galleries is easy:
1) First, log in to Portal if you haven't done so (you'll be prompted later if you're not logged in).
2) Go to the Alumni Directory (also available from Portal's homepage quicklinks, if you're logged in).
3) Click the Filters button next to the directory search bar to expand the menu of available filters.
4) At the bottom of the filters menu, check the Has Gallery Images checkbox.

5) The filtered directory will now only display alumni who have galleries.
- Alumni with galleries will also have a watermark in the lower-right corner of their alumni directory card.

6) Click on an alumni profile card to view that person's profile. Any gallery work will display on their profile page.
Tips for adding certain types of media
The alumni profile gallery is built to host still images and play embedded videos, but this may not encompass some of your work. However, by utilizing the gallery editor creatively, you can still represent other kinds of art in your gallery.
Images with Fine, Intricate Lines or Text
The gallery uploader will compress large image files so you can see the entire image in detailed/slideshow view (instead of just one section of it).
If you upload artwork containing intricate or fine line work or text, you may notice that the lines or text within the image look fuzzy or disjointed in detailed/slideshow view.
You can make sure your uploads—particularly images containing fine lines and text—look as sharp as possible by following the tips below. We've outlined how to make these changes using Preview on Mac, but you can accomplish the same using other image editing tools!
- Save your image as a PNG instead of a JPEG, if possible.
- Open your image file in Preview.
- Click the File tab, then select Export.
- Select PNG from the Format dropdown.
- Click Save.
- Reduce the dimensions of your image file to match the maximum display frame size. (On a large, 27" monitor for example, gallery images display at a max height of about 1400 pixels in full-screen mode.)
- Open your image file in Preview.
- Click the Tools tab, then select Adjust Size...
- Within the Height field, select 1400. Make sure the Scale proportionally box is checked and the unit of measure is pixels. If your image's height is already less than 1400, there is no need to change this.
- Click OK.
- Include a link to your full-size image when uploading it to the gallery so that users can still access the image in full detail.
Hosting Written Work
Upload a "preview" image that represents a piece of written work, then add a link to the full electronic text.

You have many options for "preview" images. For printed or physical texts, for example, you might consider using an image of the book, zine, or text object itself.
Here are some great examples from CCA faculty member Gia-Bao Tran (CCA's faculty and staff have access to a similar gallery feature as alumni):

For electronic works, you might instead consider creating an image containing a snippet of the text, its title, or other important details.

Properly Attributing Others' Work
In most instances, your gallery uploads should all be your original work. However, there are some exceptions to this. For example, you may wish to feature a piece of art you have made using a photo of it that someone else took.
In such cases, you can utilize the Artist(s) field in the gallery image editor to give proper credit to the photographer. Here's what this looks like from the detailed/slideshow view of an image:

Additional questions?
Alumni profile and account
Your gallery is one part of your alumni profile, though it is edited/maintained separately from the rest of your profile information. Please read the alumni profile guide for more details on your profile data, editable fields, and visibility of information. You can also find instructions for activating your account, if needed.
Technical questions
For questions about how the gallery editor works or for any other technical troubleshooting, please open a Help Desk ticket.
Feedback
Let us know what you think of the alumni gallery feature! Send us your feedback here.
Other questions
For any other questions related to your alumni gallery or profile, inclusion in the alumni directory, or alumni status, please contact the Alumni Association.