Zoom Basics
Zoom has many features that can help you connect with students and faculty outside of the classroom. This page will go over some of the basic in-meeting Zoom functions, listed below. You can click on a link below to jump to that section.

Join a Meeting
If you're invited to a Zoom meeting, you can join it by clicking the link provided to you by the host. You can also join using the Zoom client by clicking the Join button, then entering either the Meeting ID or the Personal Link Name.
For more detailed instructions, check the Joining a Zoom Meeting page.
Host a Meeting
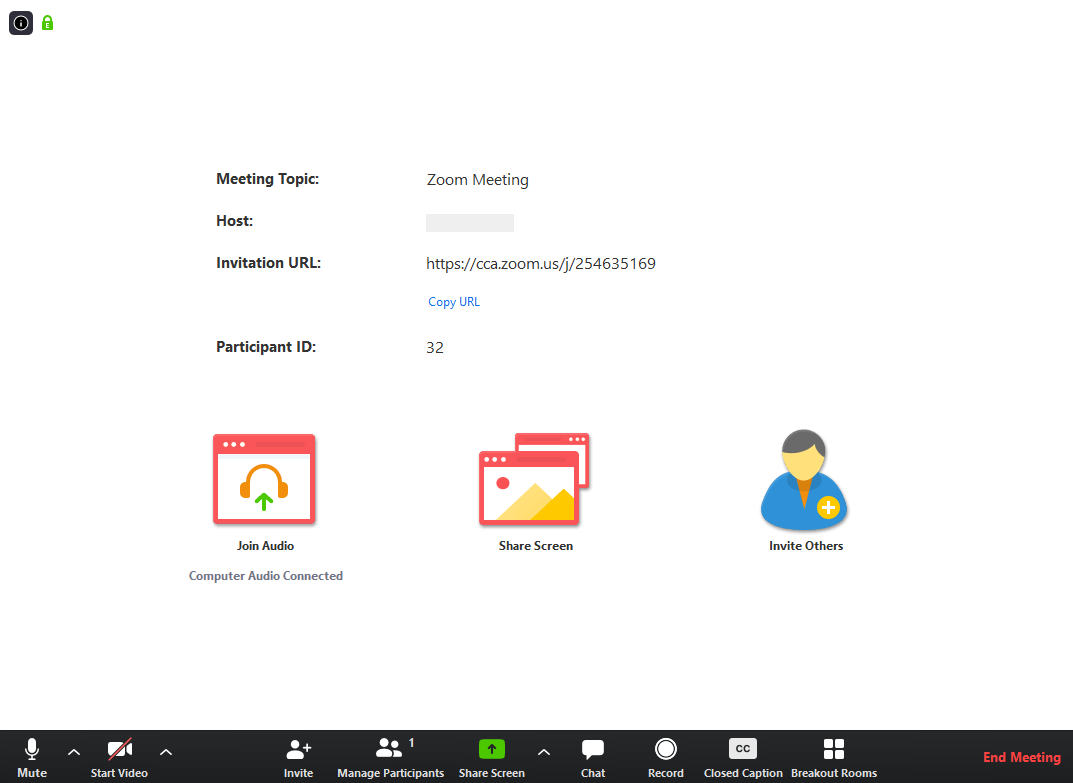
If you want to use Zoom to host your own meeting, you'll first need to download the Zoom client. Once it's installed, you can use it to start a new meeting immediately. You'll be taken directly into the meeting, and can find your settings, the meeting's URL and more. You can also decide to schedule a meeting for a later time. For more detailed instructions, check the Host a Zoom Meeting page.
Share Your Screen
While in a meeting, you can share your screen with other participants. This works on desktop clients running Zoom, but you can also share the screen of your tablet or mobile device. While in a meeting, pressing the Share Screen button will let you choose specific windows or an area of your screen to share.
If you're the host of a meeting, you can start a meeting by sharing your screen, and control if participants in the meeting are allowed to share their screens.
If you're a participant in a meeting, you can press the Share Screen button to start sharing.
Mute Video or Audio
You can control whether your microphone transmits audio, and whether your webcam transmits video, at any time during a meeting. Clicking the Mute or Start / Stop Video buttons will toggle your audio and video for the rest of the meeting's participants.
If you're participating in a meeting from a location with a lot of background noise, a common practice is to mute your audio and only turn it on when you're ready to speak.
Enable Closed Captions
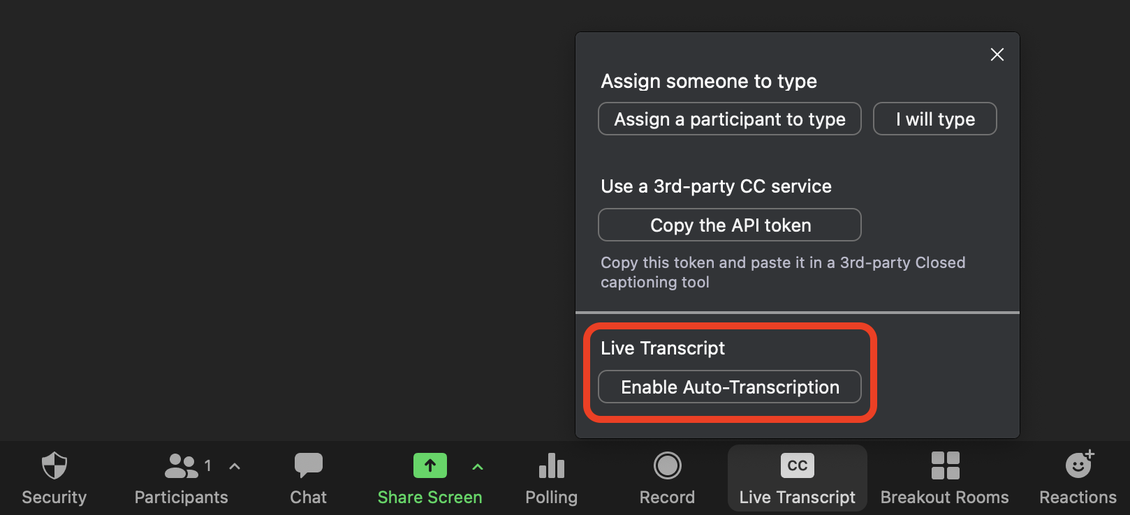
Zoom has released an update allowing hosts to enable live transcriptions (English only) for their meeting or webinar. Ensure your Zoom client is up to date. You can enable the captions via the Live Transcript button on your toolbar by selecting Enable Auto-Transcription. Captions can be seen in the Closed Captioning view and the transcript itself can be accessed by selecting View Full Transcript in the Live Transcript menu.
Hosts must enable Live Transcription in order for participants to have access to Closed Captions during the meeting or webinar.

Chat
Zoom features a built-in chat room that lets you message other participants publicly or privately. Pressing the Chat button will expand the meeting window with a group chat feed. You can enter your message at the bottom, and control who the message can be seen by. Hosts have the ability to save chat logs, and decide whom a participant can chat with during the meeting.
Record a Meeting
Zoom offers recording functionality for all meetings. This can be useful if you want to save the meeting for those who couldn't participate. Additionally, you can use this feature to record a lecture so students can watch it asynchronously.
Breakout Rooms
Breakout rooms let the host of a meeting divide the participants into smaller sub-groups for more focused meetings. The host can choose to divide participants automatically or manually, and then drop in and out of the rooms after they've been created.
End Meeting
When the meeting is over, you can click the End Meeting button on the lower right. If you're the host, you can decide whether to keep the meeting open to participants or to end the meeting for everyone. If you're a participant, you will just have the option to leave the meeting.
If you recorded the meeting, it will be converted into an .mp4 file after the meeting has ended.
