Using the Policy Page Template
The policy page template includes a number of unique fields to support the range of information that may be needed for a given policy.
Some of these fields, like Policy Statement, Effective Date, and Primary Contacts, are required. Most others, like Definitions, Procedures, and Additional Information, are optional to use.
The provided fields are intended to promote structure and consistency while providing enough flexibility to accommodate different types of policies and related information.
In addition to these content fields, the policy template also enables tagging, such that you can identify the policy subject area(s) and primary audience(s). By tagging your policies effectively, you can make it easier for users to discover them and determine their relevance.
Read more about the policy template and each of its available components below:
Title & Page Card
Title
The title, as on other Wagtail pages, is a required plain text field that displays at the top of the page.
The title field is also significant for a page’s ranking in search results. Search queries matching keywords from a page’s title are more likely to show that page at the top of the results list.
Page Card
As with other Wagtail pages indexed in Portal search, the how-to page contains the page card field, consisting of the card thumbnail and card text subfields.
The card text subfield remains a required field. If you want, you can skip selecting a card thumbnail. If you do so, your page’s thumbnail will default to the generic policy thumbnail image, shown here.
Effective Date
Effective Date is a required date selection field corresponding to when the policy first went into effect. While the exact effective date may not be documented for every policy, it is important for users to have a general sense of when a specific policy was put into place.
The effective date displays just below the page title. A "last updated" date–when the page was last published–will also display alongside the effective date.
To set an effective date, click the dialog box, which will open a calendar picker. Use this picker to toggle years and months, then click on a date to select it.
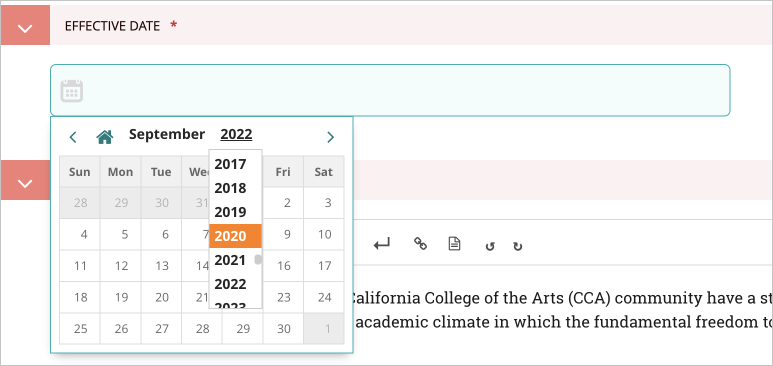
You can also type a date into the dialog box instead, using the format YYYY-MM-DD.
Note that the effective date does not need to change each time a policy is updated (a "last updated" date will display automatically, and you can use the Update History field to document previous versions of the policy).
Body Fields
Each of the following four fields–Who This Policy Applies To, Policy Statement, Procedures, and Exceptions–corresponds to Body content, which makes up the core text of a policy page.
Of these four fields, only the Policy Statement is required. However, each of these fields (when in use) displays beneath its own subheading on the policy page, in the order (top to bottom) given below.
Who This Policy Applies To
Who This Policy Applies To is an optional rich text field in the Body section of the policy template.
Although the Primary Audience content tags help specify a policy's intended audience, those tags describe broad groups like "staff" or "students." A policy may only pertain to a subset of one of those groups, such as "graduate students" or "people managers."
The Who This Policy Applies To field should be utilized in such cases where that distinction is necessary.
When in use, this field will display near the top of the page, just beneath the page title, effective date, and content tags.
Policy Statement
The Policy Statement is a required field within the Body of the policy template. The policy statement is intended to host the actual policy text.
This field has been designed to be flexible in order to accommodate different policy formats and delivery channels. The Policy Statement field in Wagtail consists of various content blocks that may be added and arranged according to the needs of the policy.
To add a new block within the Policy Statement field, click the plus icon, which will reveal a menu of options.
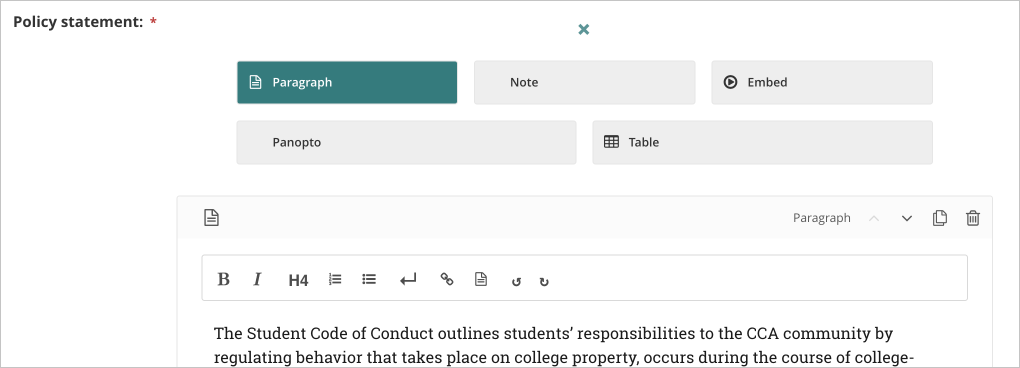
There are five block types available within the policy statement field:
Once added, any block can be reordered using the up/down arrows in the corner of the block, and you can add new blocks by clicking the plus icon on either side of an existing block.
Procedures
Procedures is an optional field within the Body of the policy template. Like the Policy Statement, Procedures is made up of a number of content blocks that can be created and arranged in different ways.
Procedures often exist side-by-side with policy. They typically describe steps and/or processes related to enacting a policy or for those affected by the policy.
Unlike a how-to page, which describes detailed technical steps to complete a specific task, procedures related to policy tend to be high-level and are often non-technical.
The five available block types for Procedures are the same as those for the Policy Statement, listed above.
Exceptions
Exceptions is an optional rich text field within the Body section of the policy template.
Some policies include exemptions for specific individuals or for specific circumstances, which should be highlighted to provide accuracy and transparency.
Definitions
The Definitions field consists of two components: an Intro Statement and the Definitions themselves (each of which includes a Term and Definition component).
Intro Statement
The Intro Statement is an optional rich text field that, when used, appears at the top of the Definitions section. The intro statement may be used to provide useful context for the terms/definitions included therein.
Definition
You can create a new definition by clicking the plus icon next to the Definitions header. Then, select the Definition content block.

This will create a new, blank Definition block, which itself has two required sub-fields:
- Term: A plain text field where you input the term being defined.
- Definition: A rich text field where you supply the meaning of the term.
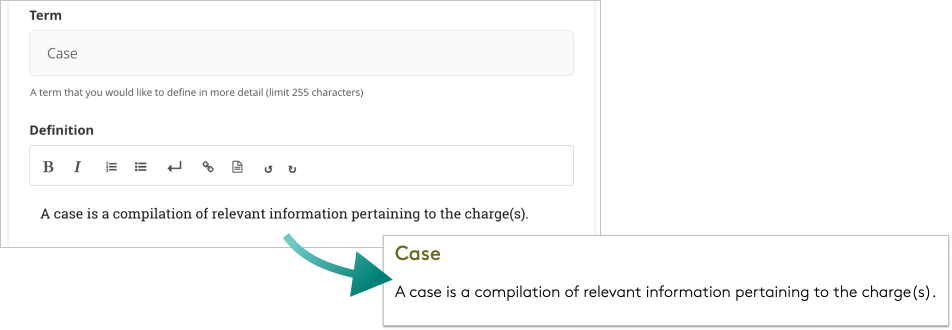
Once you've added one definition, you can use the plus icons on either side of the new block to create additional entries above or below.
You can reorder existing blocks using the up or down arrows in the corner of any block.

Additional Information
Additional Information is an optional field. Like the Policy Statement and Procedures, Additional Information is made up of a number of content blocks that can be created and arranged in different ways.
The Additional Information field may be used to add pertinent information that doesn't belong in the other sections provided.
The five available block types for Additional Information are the same as those for Procedures and Policy Statement, listed above.
Primary, Secondary, and Tertiary Contacts
The policy page template contains three fields for contact information: Primary Contacts, Secondary Contacts, and Tertiary Contacts.
Providing contact information promotes transparency and orients users who may have questions. Each of the policy page contact fields works the same way, and each policy page is required to have at least one Primary Contact.
Because policies often differ in how they are administered and who is involved in their administration, the policy page contact fields have been built to be customizable. Here's a breakdown of how they work:
Heading
Each of the three contact fields contains an optional, plaintext heading field. When used, the heading will display above all contacts added within that field (so the Primary contacts heading will display above any contacts added within the Primary Contacts field).
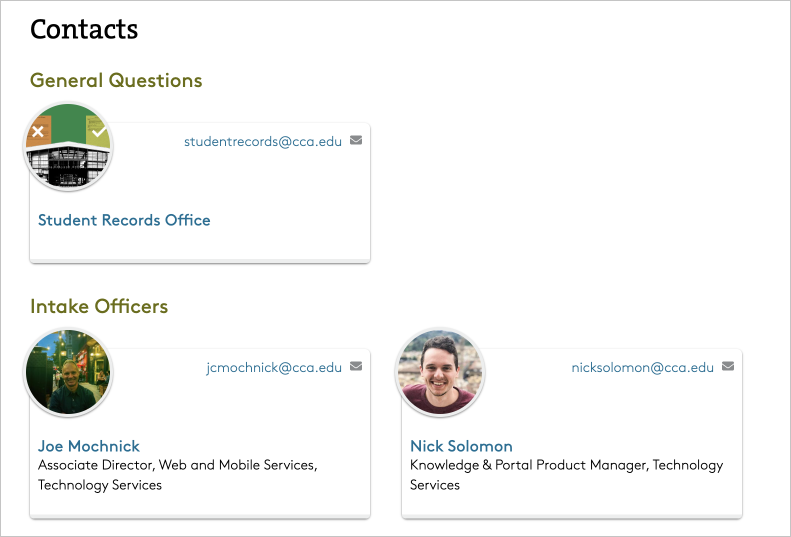
If your policy has more than one type of contact, we recommend that you use the headings to differentiate each of the contact types from one another, such as "General Questions" or "Intake Officers."
If you choose not to use the heading field, any contacts you add will still display, but without the context provided by the heading.
Below the heading field are two buttons enabling you to add different types of contacts.
Add Person
Click Add Person to add contact information for a specific CCA staff member. Once you click the button, type in the person's CCA username in the blank field provided, then select their name from the dropdown list.

Add Custom Contact
Click Add Custom Contact to add a custom contact. This is typically best for adding contact information for a team/shared email. Once you click the button, fill in the following fields accordingly:
- Name: A required plaintext field, provide the contact name you'd like to display, such as Student Records Office.
- Email: Provide an email address for this contact, such as a shared email or inbox.
- Phone: Provide a phone number for this contact as appropriate.
- Link url: Link to a website for this contact, such as a department or team webpage. When a link is used, the Name field acts as the link text.
- Avatar: Select an image associated with this contact, such as a department or team logo. A default image will be provided if you don't select one here.
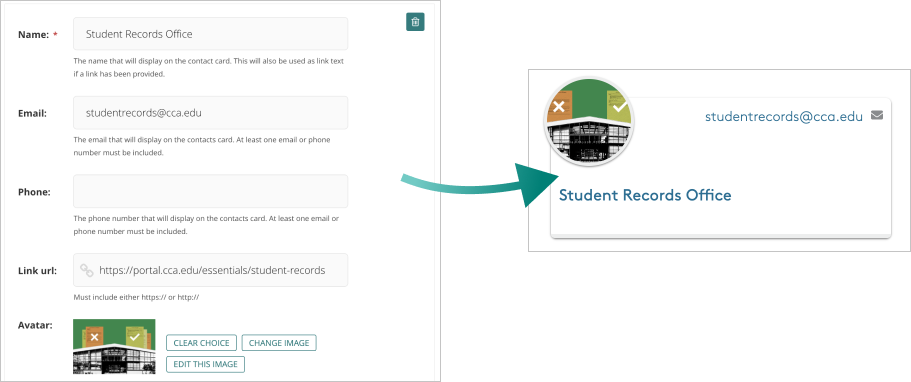
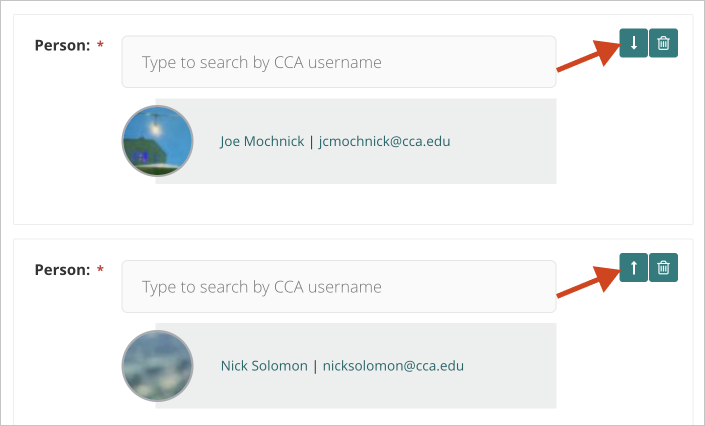
Contacts within each contact field will display two to a row in desktop view, and there is no limit to the total number of contacts you can add to each contact field. By default, custom contacts will display before person contacts.
However, you can reorder contacts of the same type using the up/down arrows within a contact block.
Update History
The Update History field lets you display a policy's publication history. Many page edits are minor (fixing typos or adding punctuation), so versions within the Update History field must be added manually. That way, you can highlight major versions of/changes to a policy without cluttering the page with all of its published versions.
To add a version within Update History, click the plus icon, then select the Revision block.

The Revision block is made up of two fields:
Date
This is a required date selection field. Click the dialog box to open the calendar picker. You can click the month or year or click the arrow toggles to change the month that displays, then select a specific day from the grid. You can also type a date into the dialog box directly using the format YYYY-MM-DD
Description
This is an optional rich text field. Use the Description to provide context about a particular revision, such as a summary of major changes, or to provide a standard nomenclature for version types (e.g., "Policy Contacts Updated" or "Updates for 2022-2023 Academic Year").
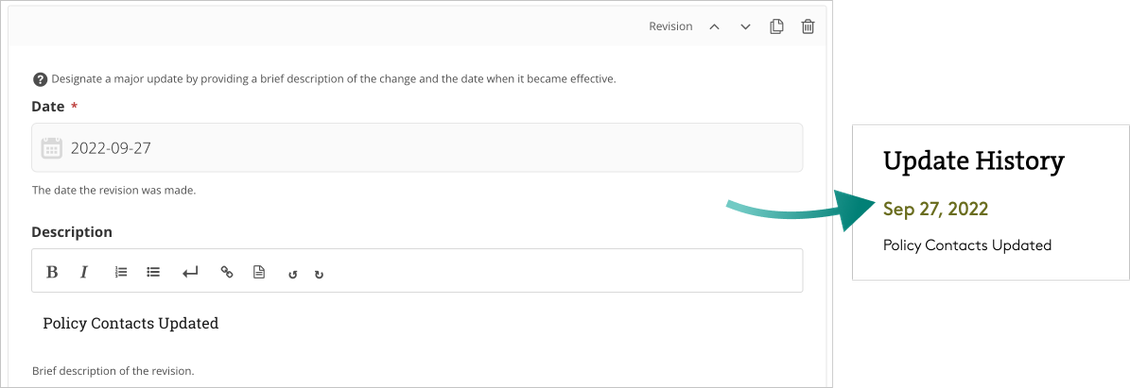
There is no limit to the number of revisions you can add to the policy Update History. Use the plus icon on either side of an existing Revision block to create a new entry.

Revisions will not automatically display based on Date, but you can reorder revisions by using the up/down arrows in the corner of any existing block.
Content Tags
Using the checkboxes provided, specify relevant Primary Audiences and associated Subjects to better classify–or tag–your content.
You can assign multiple tags of each type if appropriate, but please make sure to tag your content accurately!
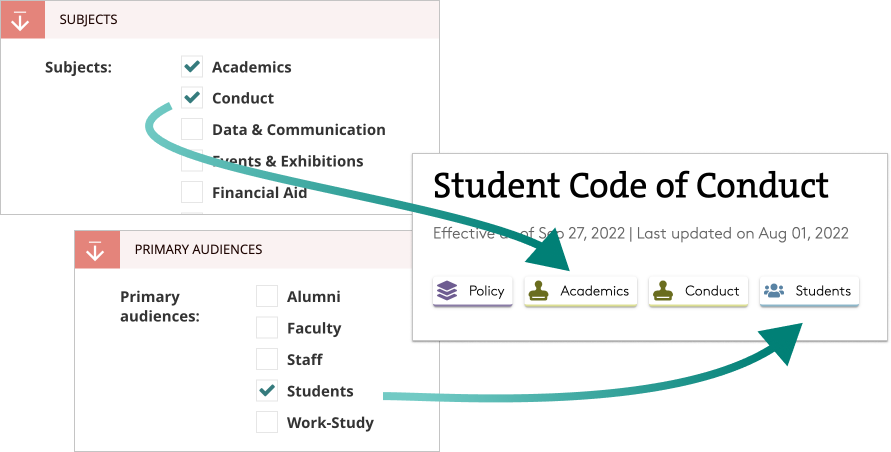
If you need new tags added to the list, please send us requests via Help Desk.
Why are Content Tags Important?
Content tags reduce our reliance on Portal’s page hierarchy in order to make policies discoverable. The policy library uses these tags to organize its browsable list of pages, and these tags also power the policy library's filtered search.
Tags allow for more nuanced content classification, eliminating the need to have multiple versions of a page for different site sections (Learning vs Essentials) or audiences (faculty vs students).
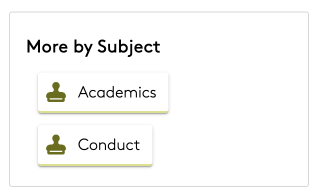
More by Subject Links
Your policy page will automatically display a sidebar link for each associated subject tag. These More by Subject links enable users to browse all other published policies tagged with the same subject.
Not only do these links aid information discovery, but they partially eliminate the need to link to related policies manually.
Format Tag
Your published page will automatically inherit a "Policy" tag, which will display in the page taglist alongside the tags you've designated manually.

The "Policy" tag corresponds to the page Format, a tag type that represents the information delivery type (determined by the page template).
Additional formats may become available if other templates are added to the policy library.
Sidebar Links
Use the Related Articles and Resources Wagtail sections to add custom text links in the policy page sidebar.
Related Articles
Within this section, you can link to other policies or other Knowledge Base how-to pages:
- Select Add Related Policies or Add Related How-tos, depending on what kind of page link you want to add.
- Select Choose a Page within the new link block.
- Type to search for a page by name, or browse the site hierarchy using the menu provided (remember that you'll only be able to select a page of the appropriate type, either policy or how-to).
You can reorder links of the same page type by using the up/down arrows within any link block. Policy links will display beneath a Related Policies subheading, while how-to links will display beneath a Related How-Tos subheading.
Resources
Three link types are available within the Resources Wagtail section:
- Related Links lead to any designated URL. These may be used to link to content outside of Portal.
- Related Pages link to Portal pages only. These links are self-maintaining, so they’ll update automatically instead of breaking.
- Related Documents link to any uploaded Wagtail document. Wagtail Documents are often utilized for PDF links.
As with Related Articles, Resource links of the same type may be reordered by using the up/down arrows within any link block.
Within the page sidebar, document links will display beneath a Related Resources subheading, external links will display beneath a Related Links subheading, and Portal page links will display beneath a Related Pages subheading.