Adding Content and Resources to Moodle - Faculty
Moodle supports a wide variety of digital file types to add media to your course and help give it substance. Media can consist of video, sound clips, and more! You can embed these right on your course page for ease of viewing for your students, but keep in mind that you can also provide external links to sites as well. Any time you see the Text Editor, you can embed media into it.
On this page, you'll find more about:
Adding images
Adding videos
Adding links
Common Resources and their uses
While the Moodle mobile app is good for the consumption of media, it is not recommended for uploading media to a Moodle course page or to an assignment or forum. It is best to use a laptop or desktop and do this work in a browser.
Adding images
There are many ways to add images to your course. Some of the most common options are as follows:
Dragging and dropping files
You can add images to your Moodle course by simply dragging and dropping an image file from your computer into the desired course topic/section.
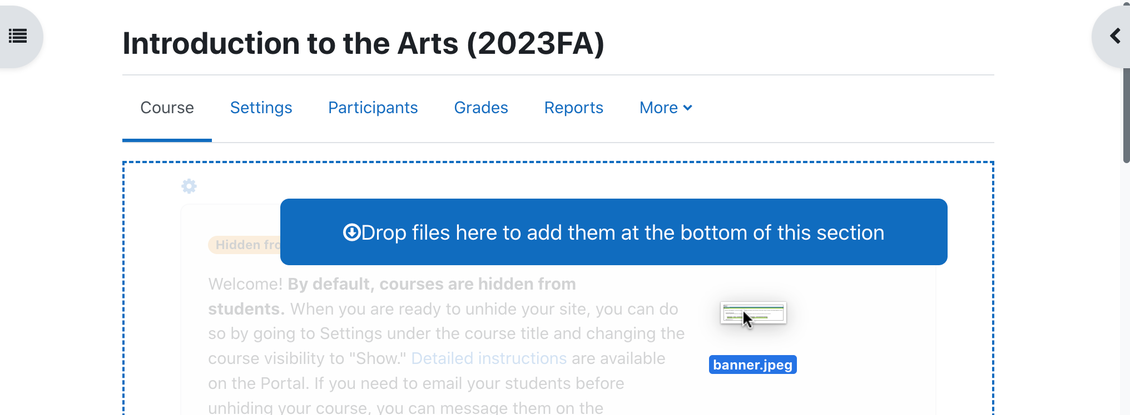
- Toggle Edit Mode on (located at the top right of your course).
- Drag your file(s) from your computer to the course. A blue dotted line will appear while your mouse hovers over your course.
- After dropping the file(s), a pop-up window will prompt you to choose between the following:
- Add Media to Course Page: Displays the image on the Moodle Course page.
- Create a File Resource: Creates a link within your course page, which takes students to a separate page in your course with the image.
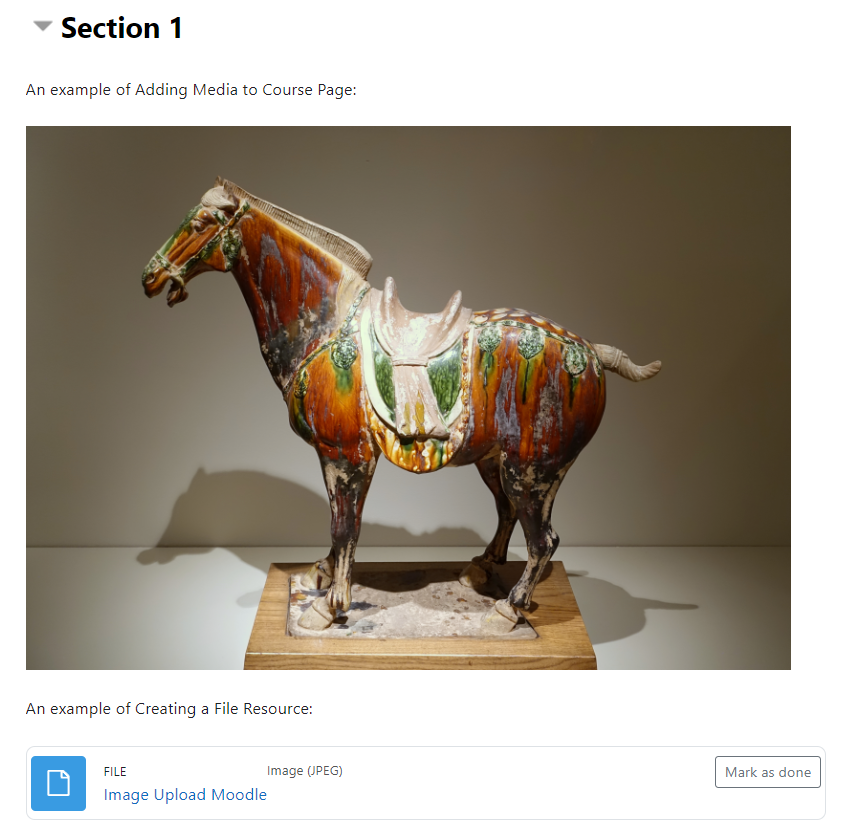
When adding an image as a File resource, the resource will always display as a text link on the main Moodle course page.
Adding an image as a File resource
1. Toggle Edit Mode on (located at the top right of your course).
2. Find the section where you want your link to be listed. Click "Add an Activity or Resource" at the bottom of the section.
3. Select File from the Resources list.
4. On the following page, fill in a name you want to display for the image file link.
5. Scroll down to the Select Files section, then click the document icon to add a file or drag and drop a file into the designated location.
- The document icon option will allow you access to uploading a file, accessing recent files, connect with your Google Drive, and more.

6. Click either Save and return to course or Save and display.
Recommended image sizes in Moodle
If you use banners or other visual elements in your Moodle course, please consult this table for recommended image sizes.
Note that changing the size of the photo with "Auto-size" turned off may warp the image. You should leave "Auto size" turned on to maintain the proper aspect ratio of the image.
Adding videos
If you have a video file you want to share in Moodle, it's best to upload it to Panopto first. Learn more about adding Panopto videos to your Moodle course in this help documentation.
Adding a link to the video
- Toggle Edit Mode on (located at the top right of your course).
- Find the section where you want your link to be listed. Click "Add an Activity or Resource" at the bottom of the section.
- Select URL from the Resources list.
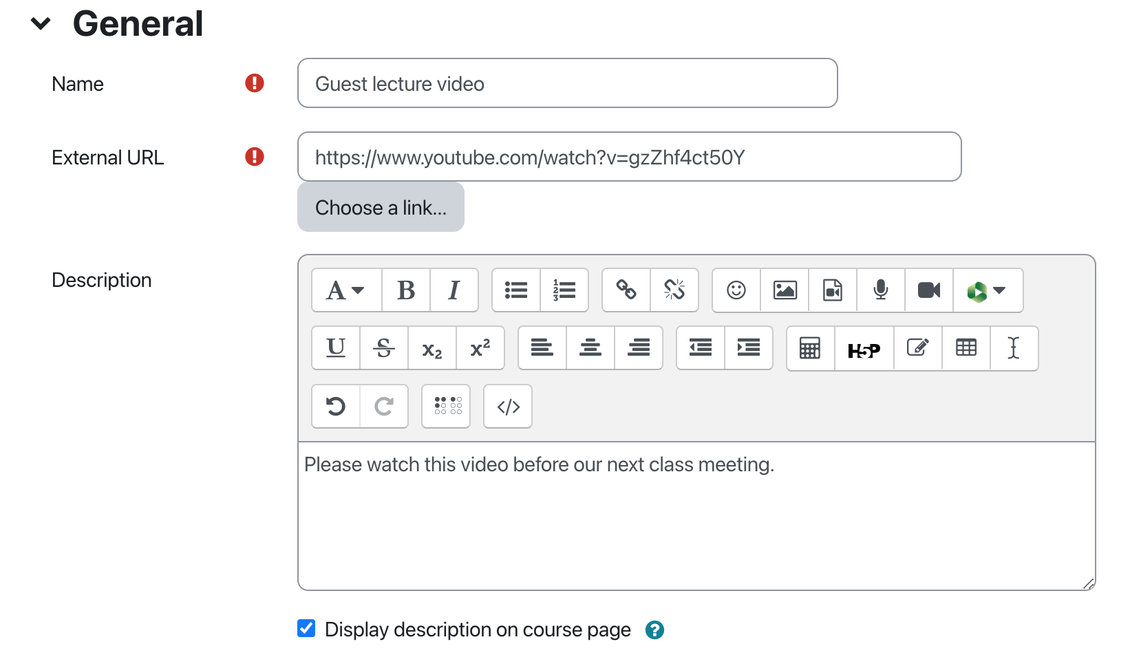
- Paste the video link into the External URL text field, and supply a name and optional description for display on your Moodle course page. Please note that we recommend enabling the "Display description on course page" option if you are adding a description.
- Click Save and return to course or Save and display to complete.
Embedding a Video
You also have the option to embed a video that will display on your main course page.
1. Turn the Edit mode toggle on.
2. Find the week or topic where you want your video embedded. Click "Add an Activity or Resource" at the bottom of that section.
3. Select Label from the Resources list.
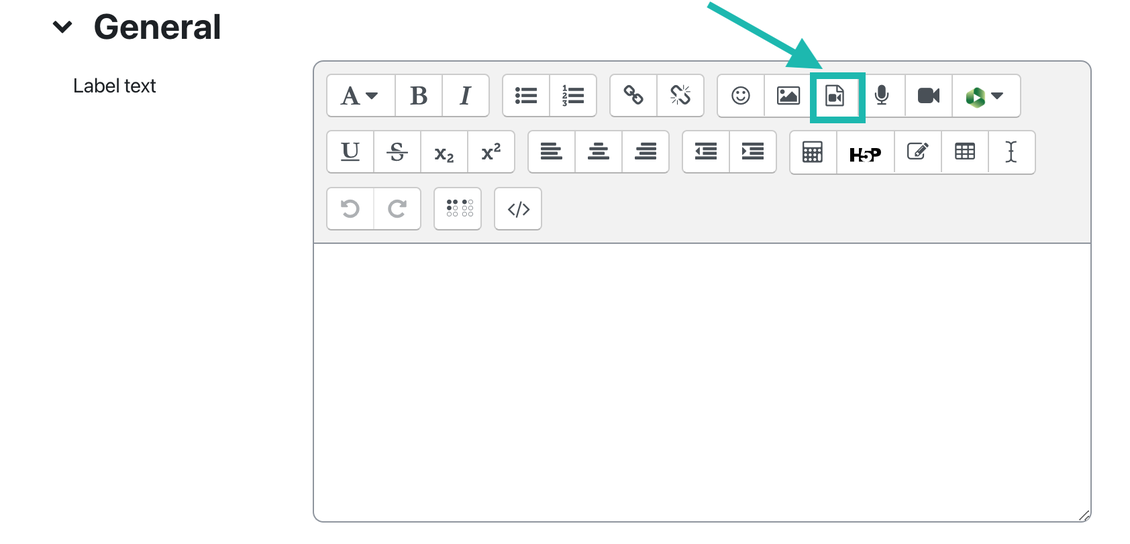
4. In the text editor that appears, click the smaller video camera icon button to add media.
5. In the pop-up window, click the Video tab and paste the video link into the text box. Then click the Insert media button to return to the Label editing screen.
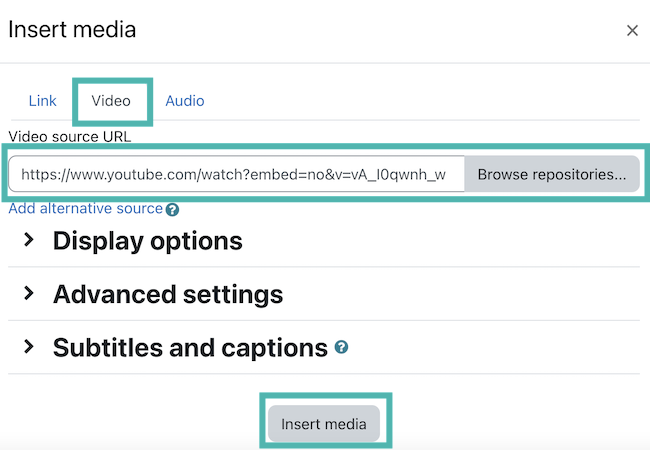
6. Click Save and return to course to complete your video embed.
Common Resources and their uses
|
File |
The File resource enables a teacher to provide a file as a course resource. Where possible, the File will be displayed within the course interface; otherwise students will be prompted to download it. |
|---|---|
|
Folder |
If you plan on uploading materials for a lesson, a Folder is the way to go. A Folder allows each file to be accessed and displayed in a clear, organized fashion. You can create a Folder by using the Activity chooser or by dragging and dropping a zip file to your course page. |
|
Label |
The Label resource enables text and multimedia to be inserted into the course page in between links to other resources and activities. It can be helpful in organizing your page into sections. |
|
Page |
The Page resource enables a teacher to create a web page using the text editor. A Page can display text, images, sound, video, web links and embedded code, such as Google maps. |